
TUTORIAL: Showstopping DIY Thanksgiving Place Cards

Turkey! Pie! Football! Awkward conversations with family about the ongoing impeachment inquiry! Okay, that last one aside, Thanksgiving is pretty great. In fact, it’s one of my favorite days of the year. It’s all about being grateful, spending time with those you love and eating until the buttons pop off your pants (which is why I only wear leggings — this ain’t my first rodeo). So even though the stores seem to have forgotten about it (STAY IN YOUR LANE, ST. NICK), it’s just a couple weeks away — and we’re going to do it up with a little DIY.
Whether you’re having a major feast with your entire extended family or a small affair with your closest friends. let’s make this Thanksgiving/Friendsgiving extra special with some DIY place cards! I’m going to show you 3 different ways to take your place cards from “oh, that’s nice!” to “daaaaaaamn.” But first, you’ll need to grab a couple things.
Place cards. I prefer the tented place cards, but you do you! I am using Eco White place cards from Paper Source.
Brush pen. I used a small tip brush pen — both the Tombow Fudenosuke and Pentel Sign Brush.
And technically, that’s all you need to create your place cards… but if you’re here reading this, I’m guessing you’re as extra as me. So while hand scripted place cards are pretty great on their own, I’m going to show you how to take them up a notch with things you likely already have for your Thanksgiving feast.
Mini Pumpkin Place Card
If you don’t have any of these little orange buddies as a part of your decor, you can pick them up for about 50 cents at the grocery store. Be sure to grab pumpkins with an intact stem — some of the little guys don’t have stems, so don’t just grab random ones without checking. Use a serrated knife to saw a slot in the stem for your card you’re going to feel a little like a lumberjack, which is always fun. Don’t cut too deep, though — the stems are brittle and WILL crack.

Once you have the slot, slide your card in, put on your place setting and wait for the “oohs” and “aah” to pour in like gravy.

Fresh Herb Place Card
If you’re cooking turkey or literally any vegetable dish, you’re going to have some fresh herbs on hand. Take some of those herbs and add to your place cards! I’ve tried it a bunch of different ways (like, a BUNCH), and these two were my fave.
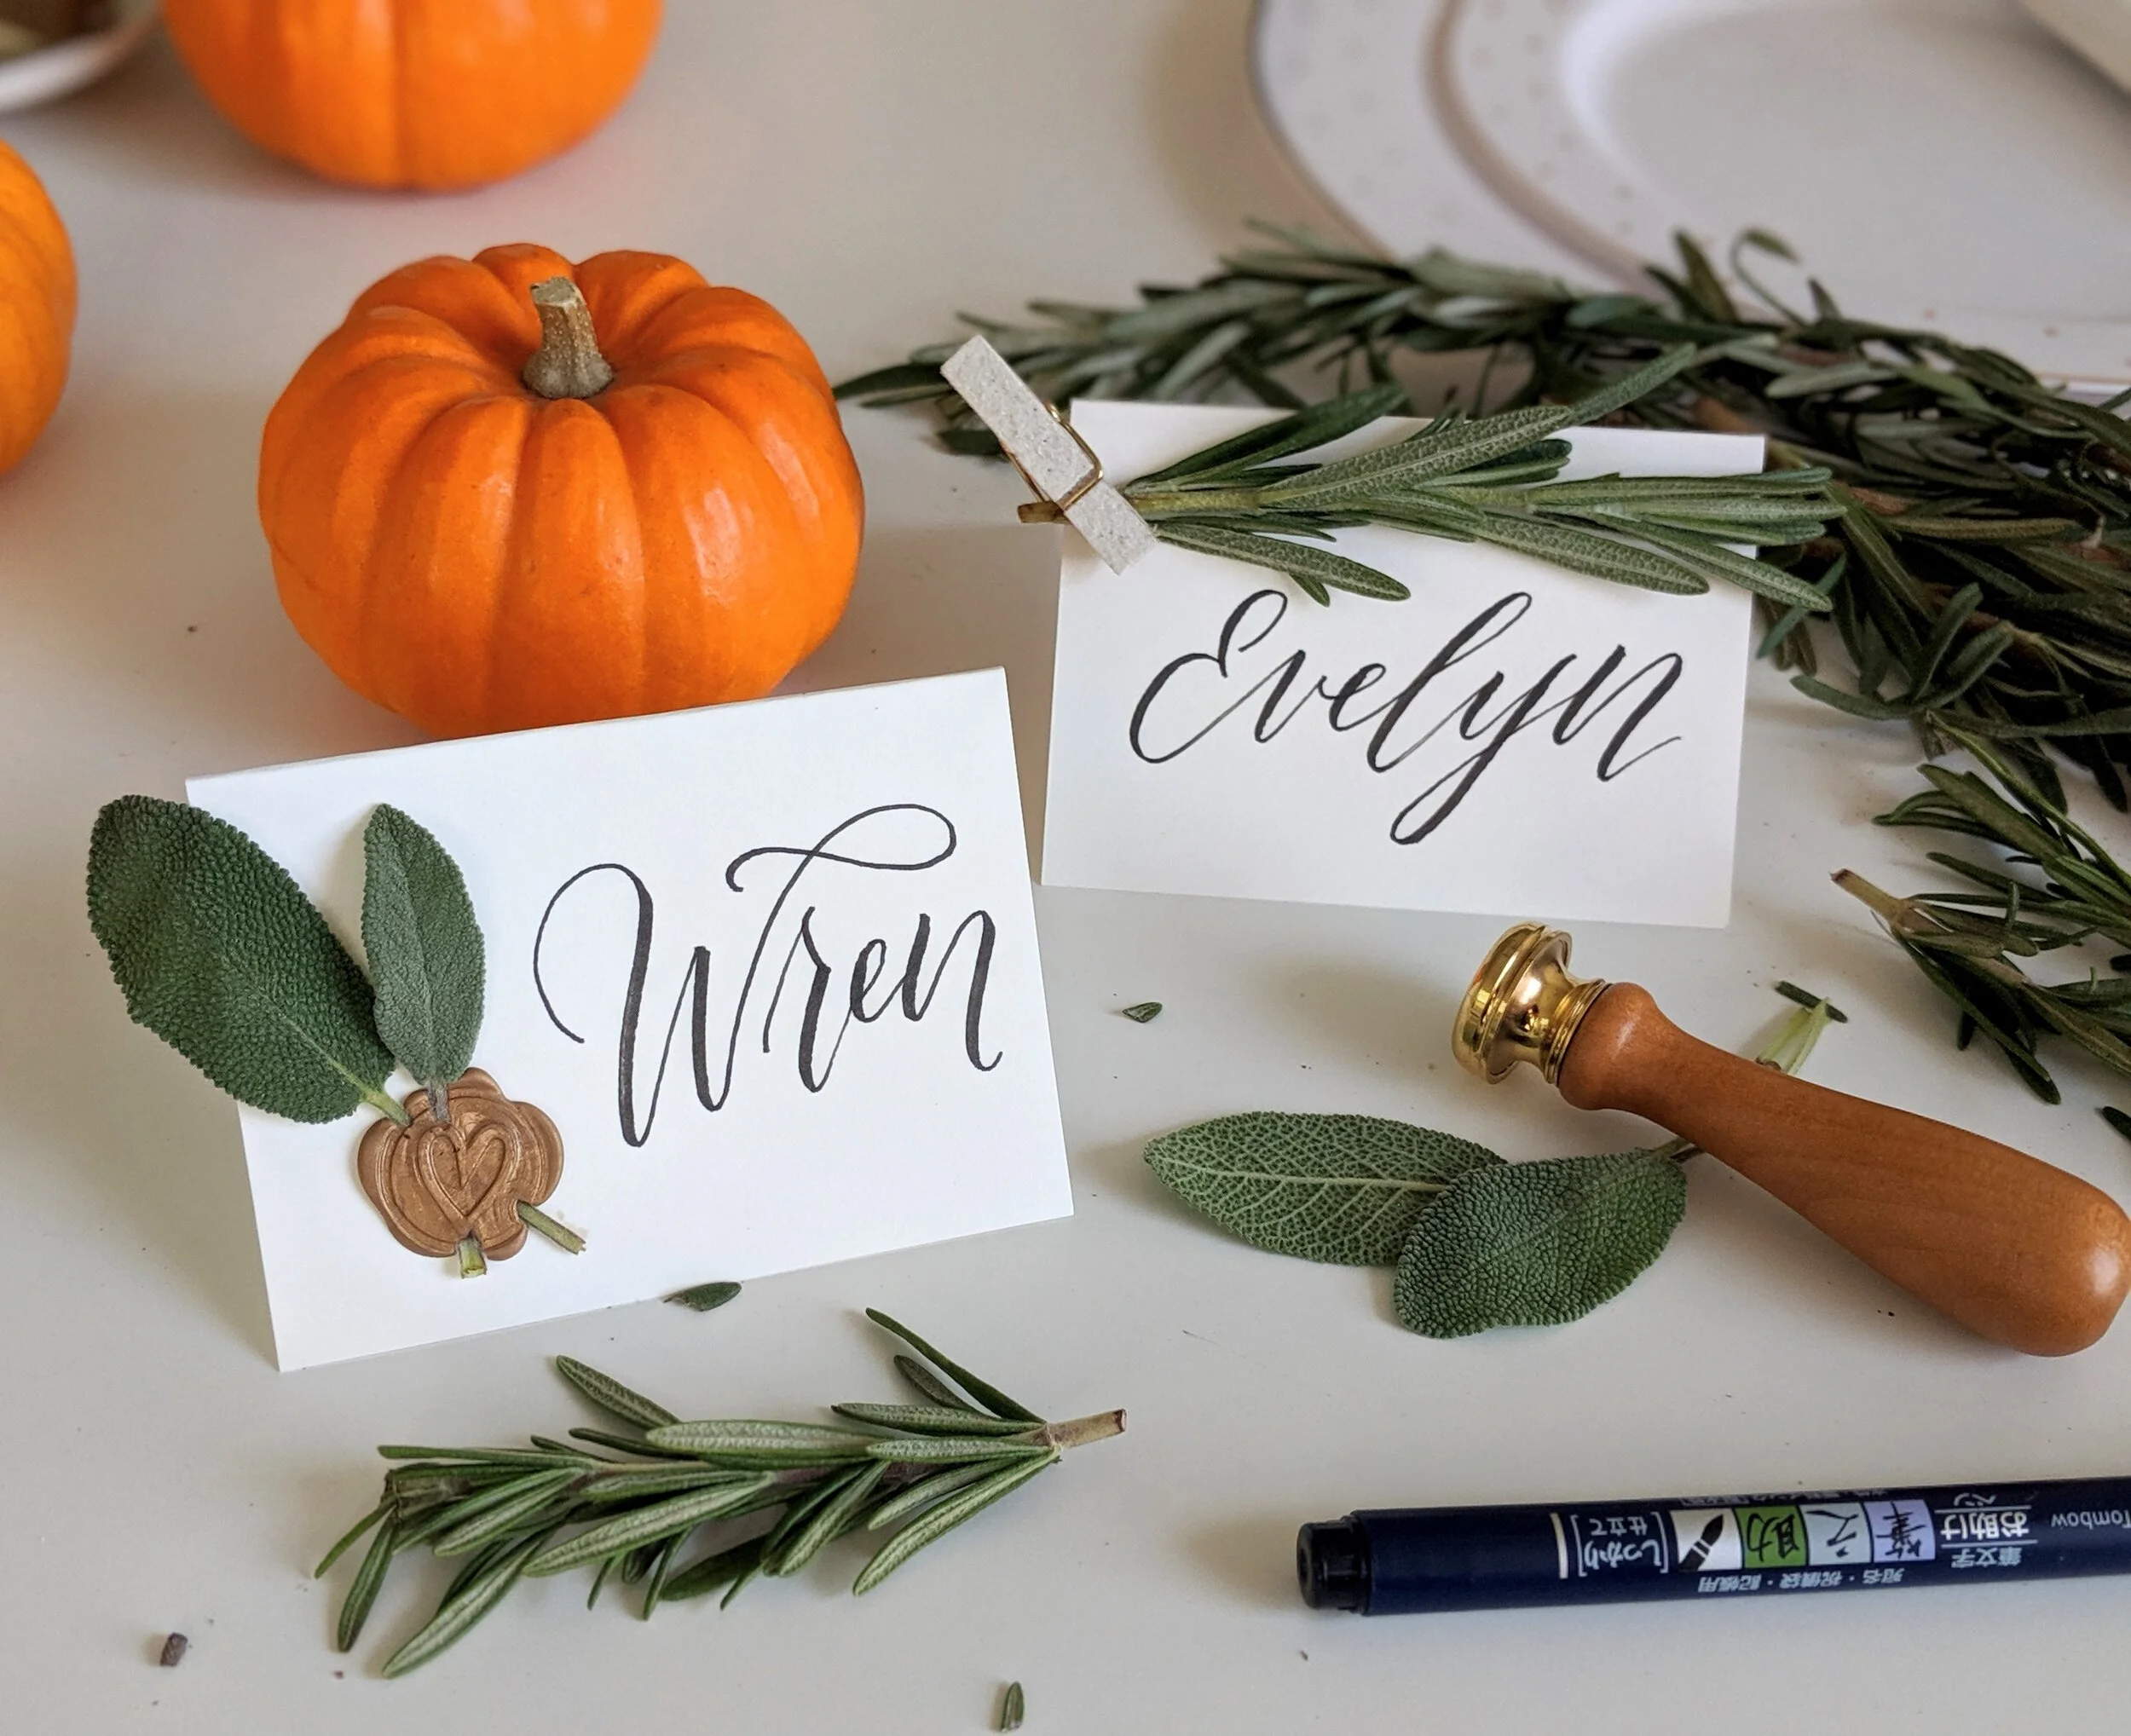
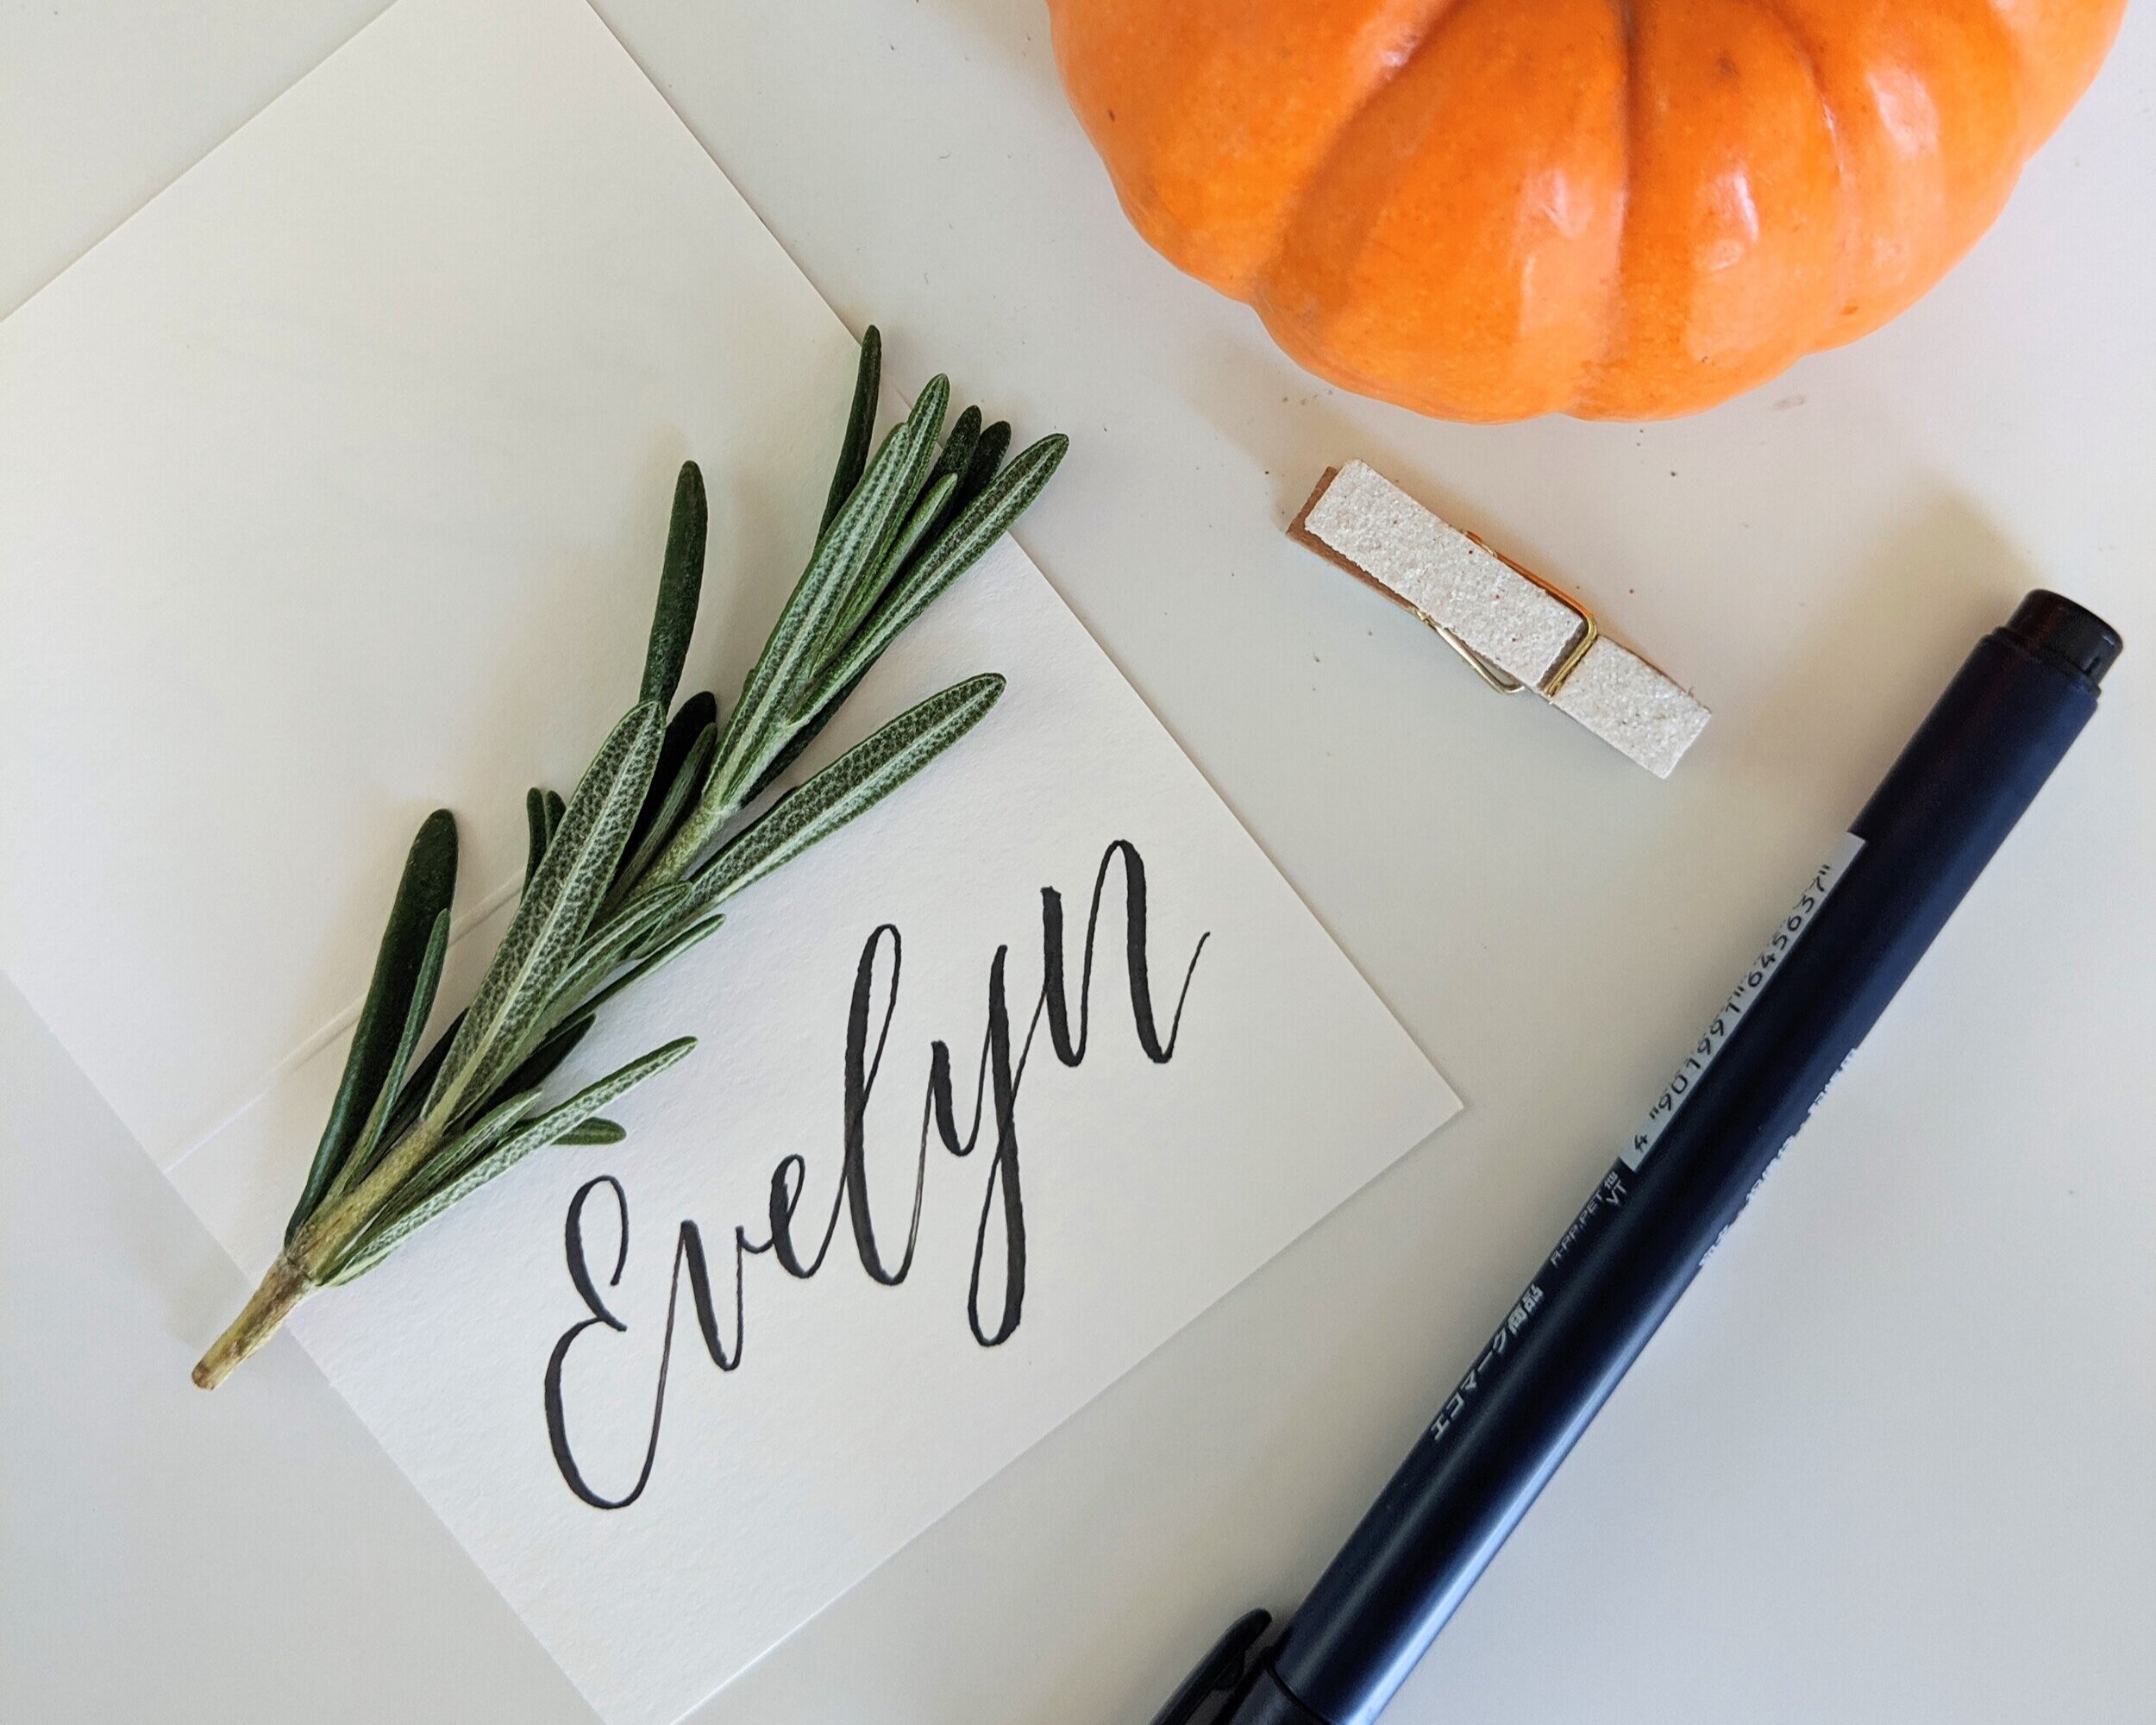
For the rosemary place card, script the name a bit lower on the place card than you normally would. Then use a mini paper clip to attach a fresh sprig so it extends across the top — I got this little glittery clip from the Target Dollar Spot. If it droops a little at the unattached end, add a tiny piece of double sided tape.

Briefly considered Photoshopping out my hangnail… but this is real life, people! Also, if there are any good manicurists out there…

For the sage place card, I attached two fresh leaves with a wax seal. I’ll admit it, I didn’t get great process photos of this. Turns out, it’s tricky to hold a burning candle and take pics at the same time. Nevertheless, to attach the sage with a wax seal, first place the herbs on a paper towel and arrange them how you would like them to appear on your card. Then use your seal to squish and flatten the stems — you can see how flat they are in the picture below.
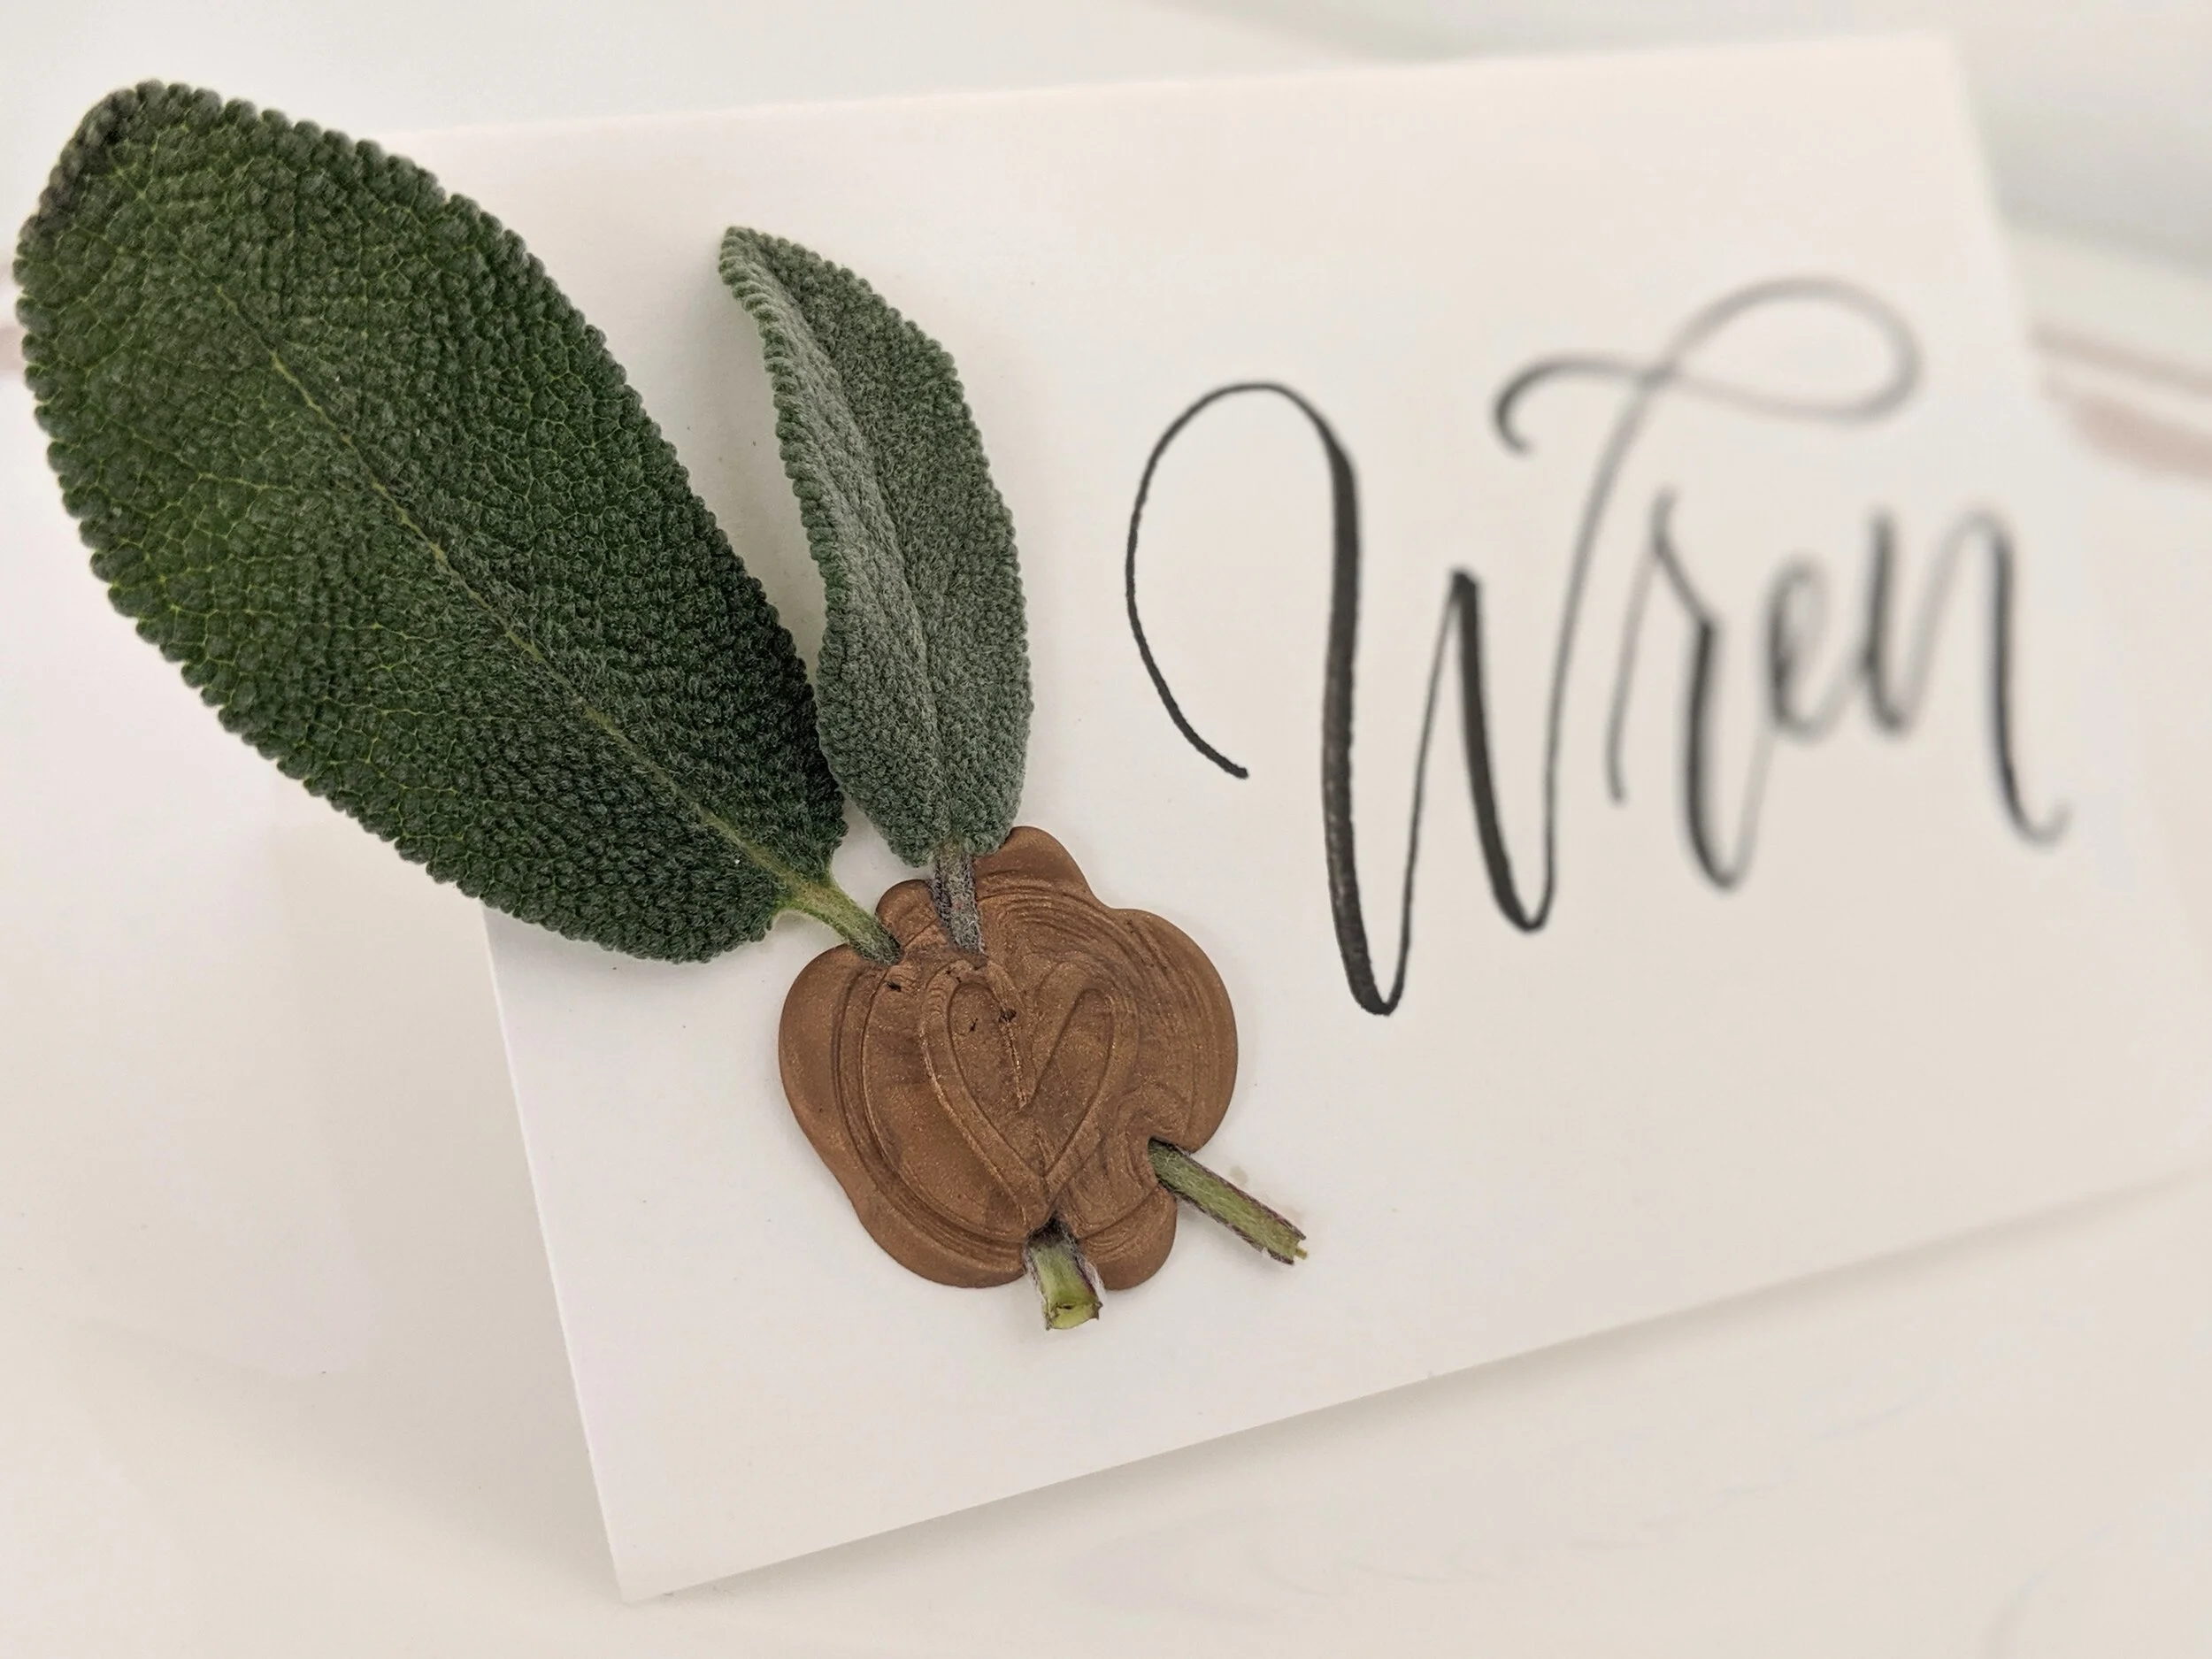
The reason we do this on a paper towel is that some liquid (plant blood?) may drain out, and you don’t want it on your card — you can see a little on mine above (whoops). Once it’s nice and flat, place on your card and apply the wax seal. You’ll want to drip a bit more wax than you usually do to make sure it sticks. Don’t have a wax seal laying around? You can pick up the seal I used at your local Paper Source, or you can try attaching it with a bit of gold washi tape! One note: if you plan on creating these cards the day before, be sure to leave them in the fridge overnight so the herbs don’t get droopy.

To Go Container
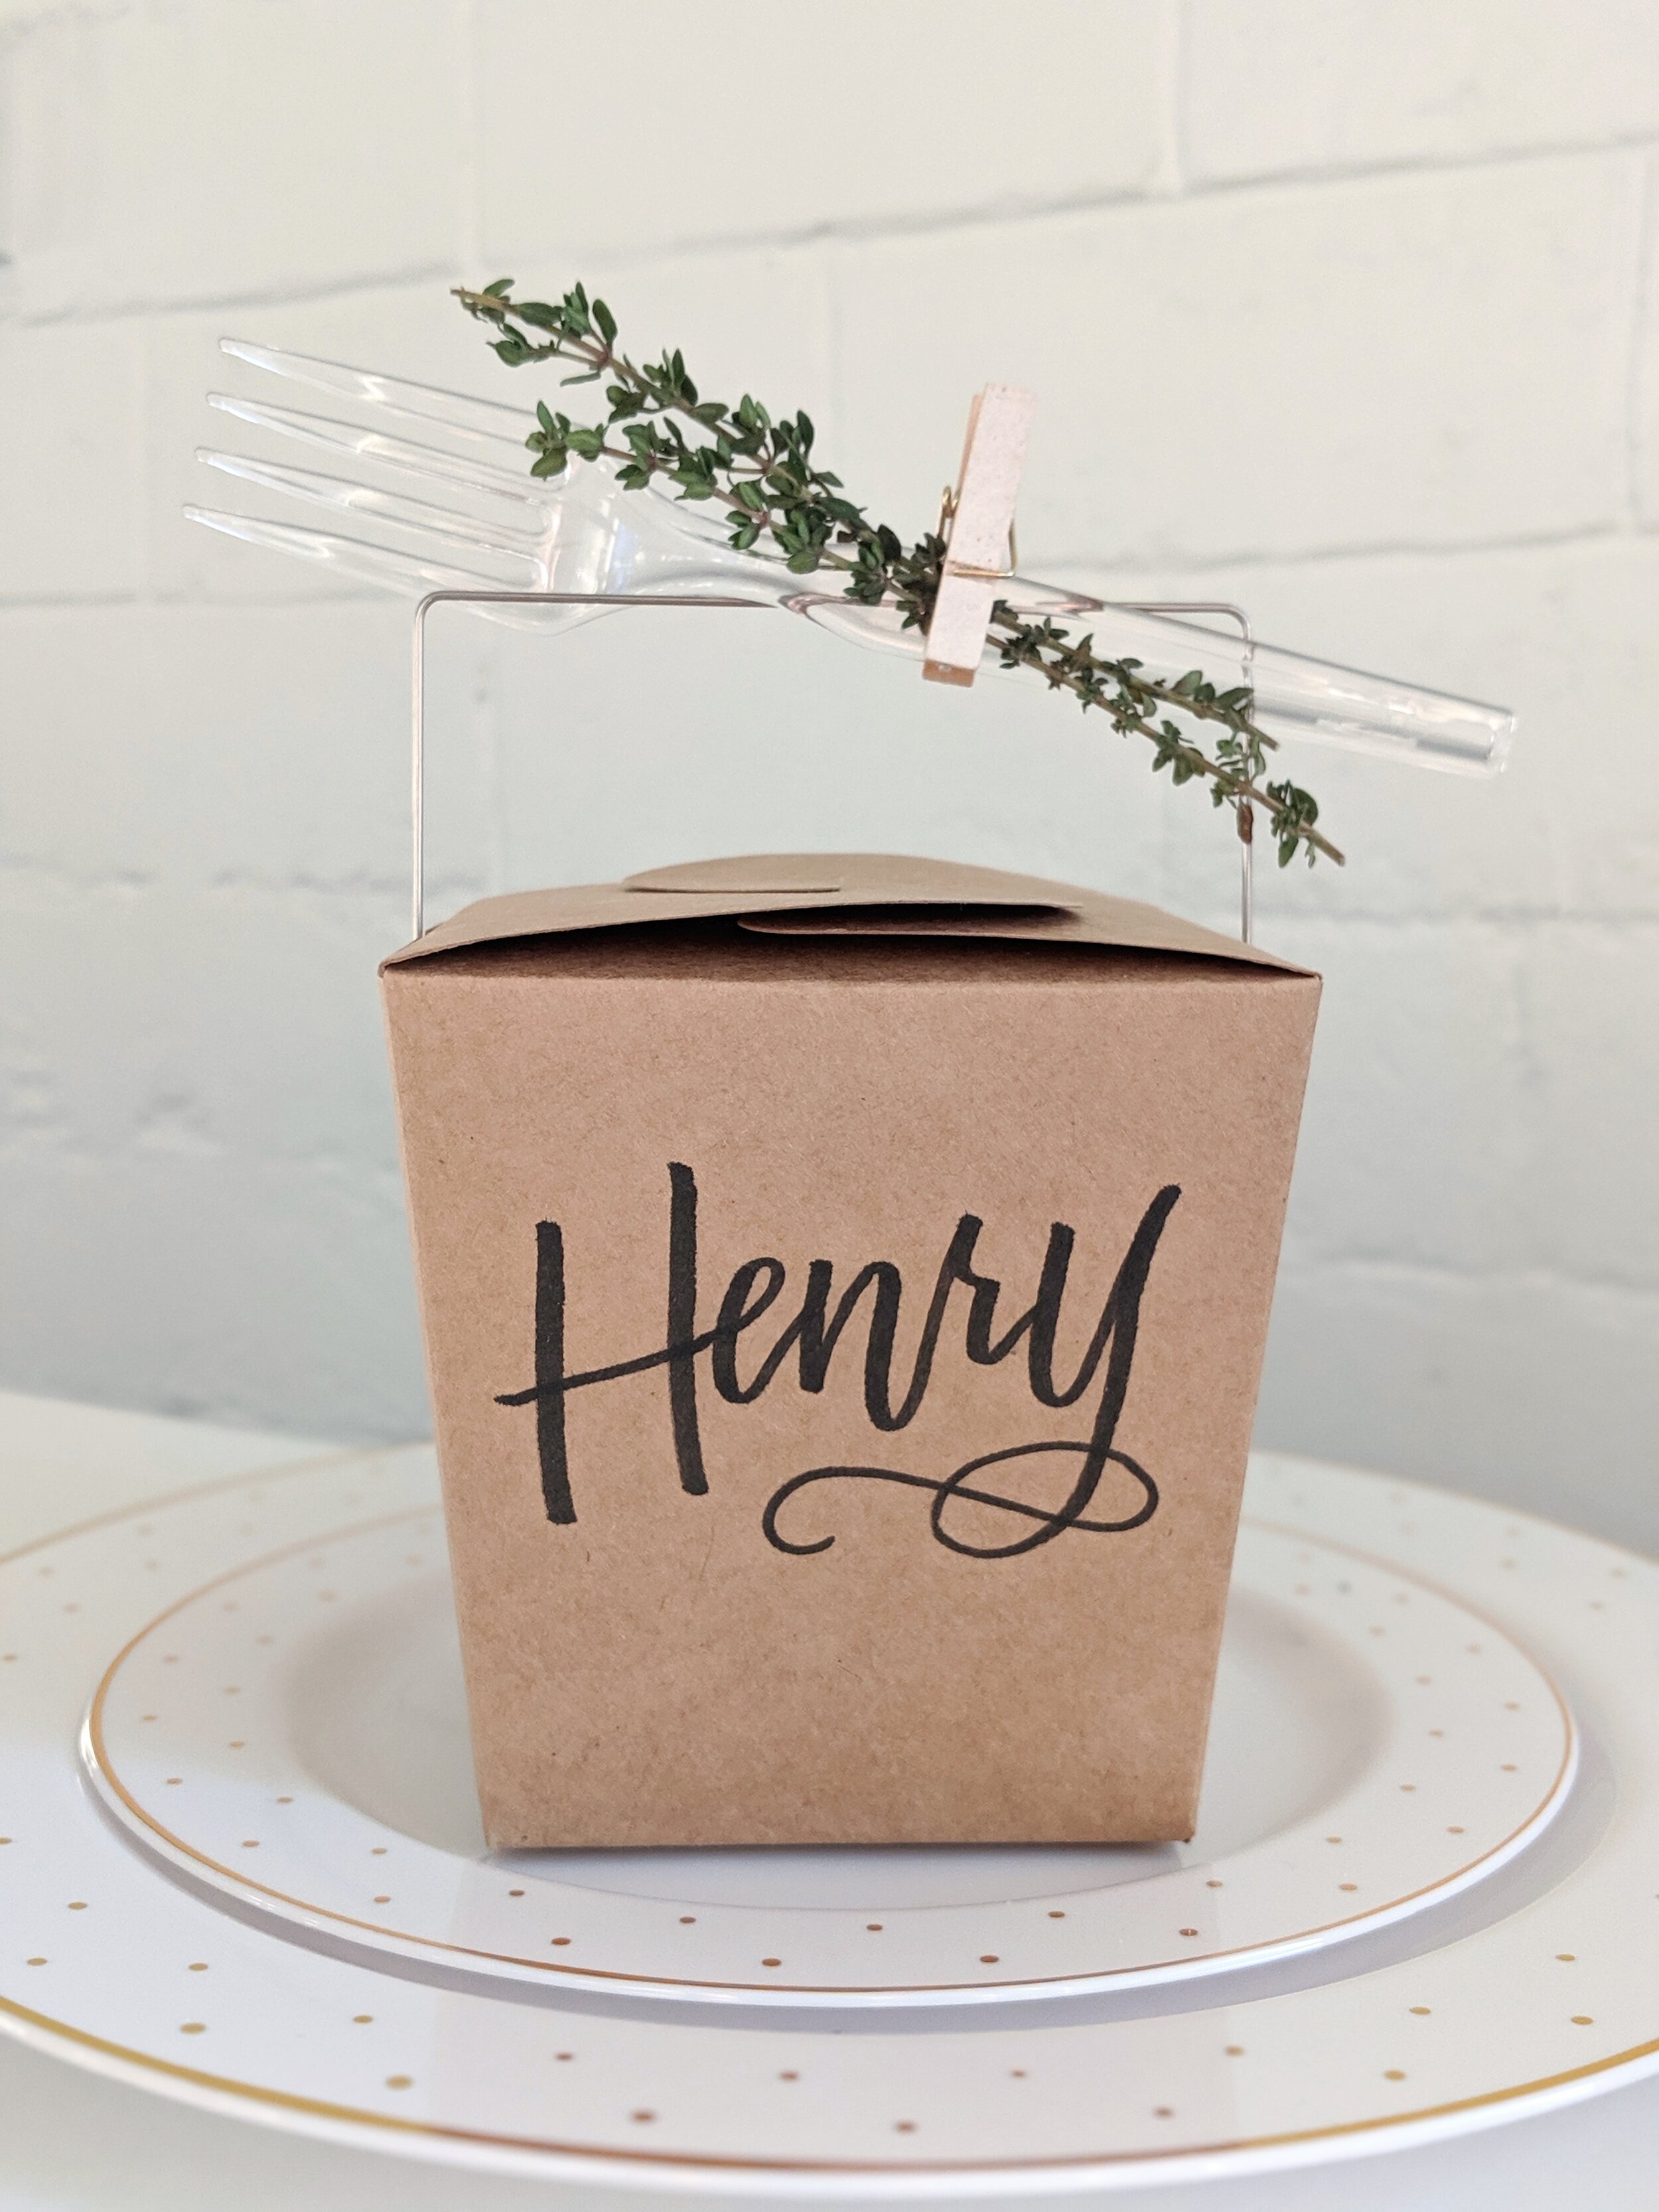
I have yet to attend a Thanksgiving meal that didn’t have ample amounts of leftovers. Let your guests know they can take some home with them! Pick up some paper to-go containers (these are from Michael’s, but if you need a large amount, check out your local cash and carry paper store), and script the name directly on the box. For this, I used the thicker Faber-Castell Pitt Artist Brush Pen instead of the small brushes — tried both, and liked this look much better!
Because you are scripting on a very raised surface, I recommend setting up a stack of books next to the container so you are working on an even surface. See pictures below. (Yes, that is a book about pie, and it is amazing. It’s Art of Pie by Kate McDermott, and it’s a must own for any baker.)

Once you have it all scripted, use a clear elastic rubber band (in the hair aisle at any grocery store or pharmacy) to attach some fresh herbs (I used thyme) to a fork. Then use a mini paper clip (again, I picked these up in the Target Dollar Spot) to attach to the top of your container. Not only will your guest be able to find their seat AND take home some food, but they’ll also be able to enjoy a bite on the way home!

Which of these would you like at your Thanksgiving table? If you try one out, be sure to share on the ‘gram and tag @hooplaletters so I can share your fabulous work. If you have any questions, please leave them in the comments below!
Happy Thanksgiving, everyone!