TUTORIAL: Eucalyptus Leaf & Flower Mail Art

We’re going to start out with a little life update explaining my loong absence, so if you just want the tutorial, scroll, baby, scroll! Also, this post briefly mentions the availability of COVID vaccines for children. If you feel the need to comment with your opinions on vaccines, please don’t. My purpose in mentioning the vaccine is just to give a life update… not to get into a scientific debate. Thanks!
It’s been a while… but I’m back, baby! Truth is, this parenting-two-kids-under-5-during-a-pandemic thing is like, um, real hard. Hoopla! Letters has still been plugging along, but social media — including blogging — has had to take a seat on the back burner while our household went into straight-up survival mode. And, if I’m being honest, we’re still there and likely will be until the girls can get vaccinated (any other parents of little kids feeling completely forgotten about as the world moves on from COVID?).
And if I’m being even more honest, I’ve been wildly depressed these past few months. In May and June, I felt like we were on our way out. I felt hope for the first time in a long time. And then… well, you know what happened. And Even thought my husband and I are vaccinated, the girls are not. And because they are both under 5, they likely won’t be until next year. And the prospect of doing this until 2022 is… overwhelming. And when you can barely pull yourself out of bed in the morning, making punny calligraphy quips for Instagram isn’t at the top of your to-do list.
But recently, I did a little personal project that brought me and a lot of 3 year olds a lot of joy. So I’m breaking my no-blog streak with a super fun mail eucalyptus mail art tutorial!
Why eucalyptus? My daughter Wren loves koalas. LOVES. There’s a great show on Netflix called Izzy’s Koala World about a girl and her family who run a koala rescue center on Magnetic Island in Australia. We’ve seen every episode dozens of times, and she has really fallen in love with those fuzzy, sleepy creatures (I mean, who can blame her?). So much so that she requested a koala theme for her 4th birthday party… which you know I was more than happy to oblige. So today, I’m going to walk you through the deceptively simple process (really!) of creating the eucalyptus envelope art that I used for her invitations.
WHAT YOU’LL NEED (What I Used)
Light colored envelope (A7 in Blossom from Paper Source)
Green marker (Tombow Dual Brush 296)
Pink marker (Tombow Dual Brush 755)
Yellow marker (Tombow Dual Brush 985)
OPTIONAL: Dark green marker (Tombow Dual Brush 249)
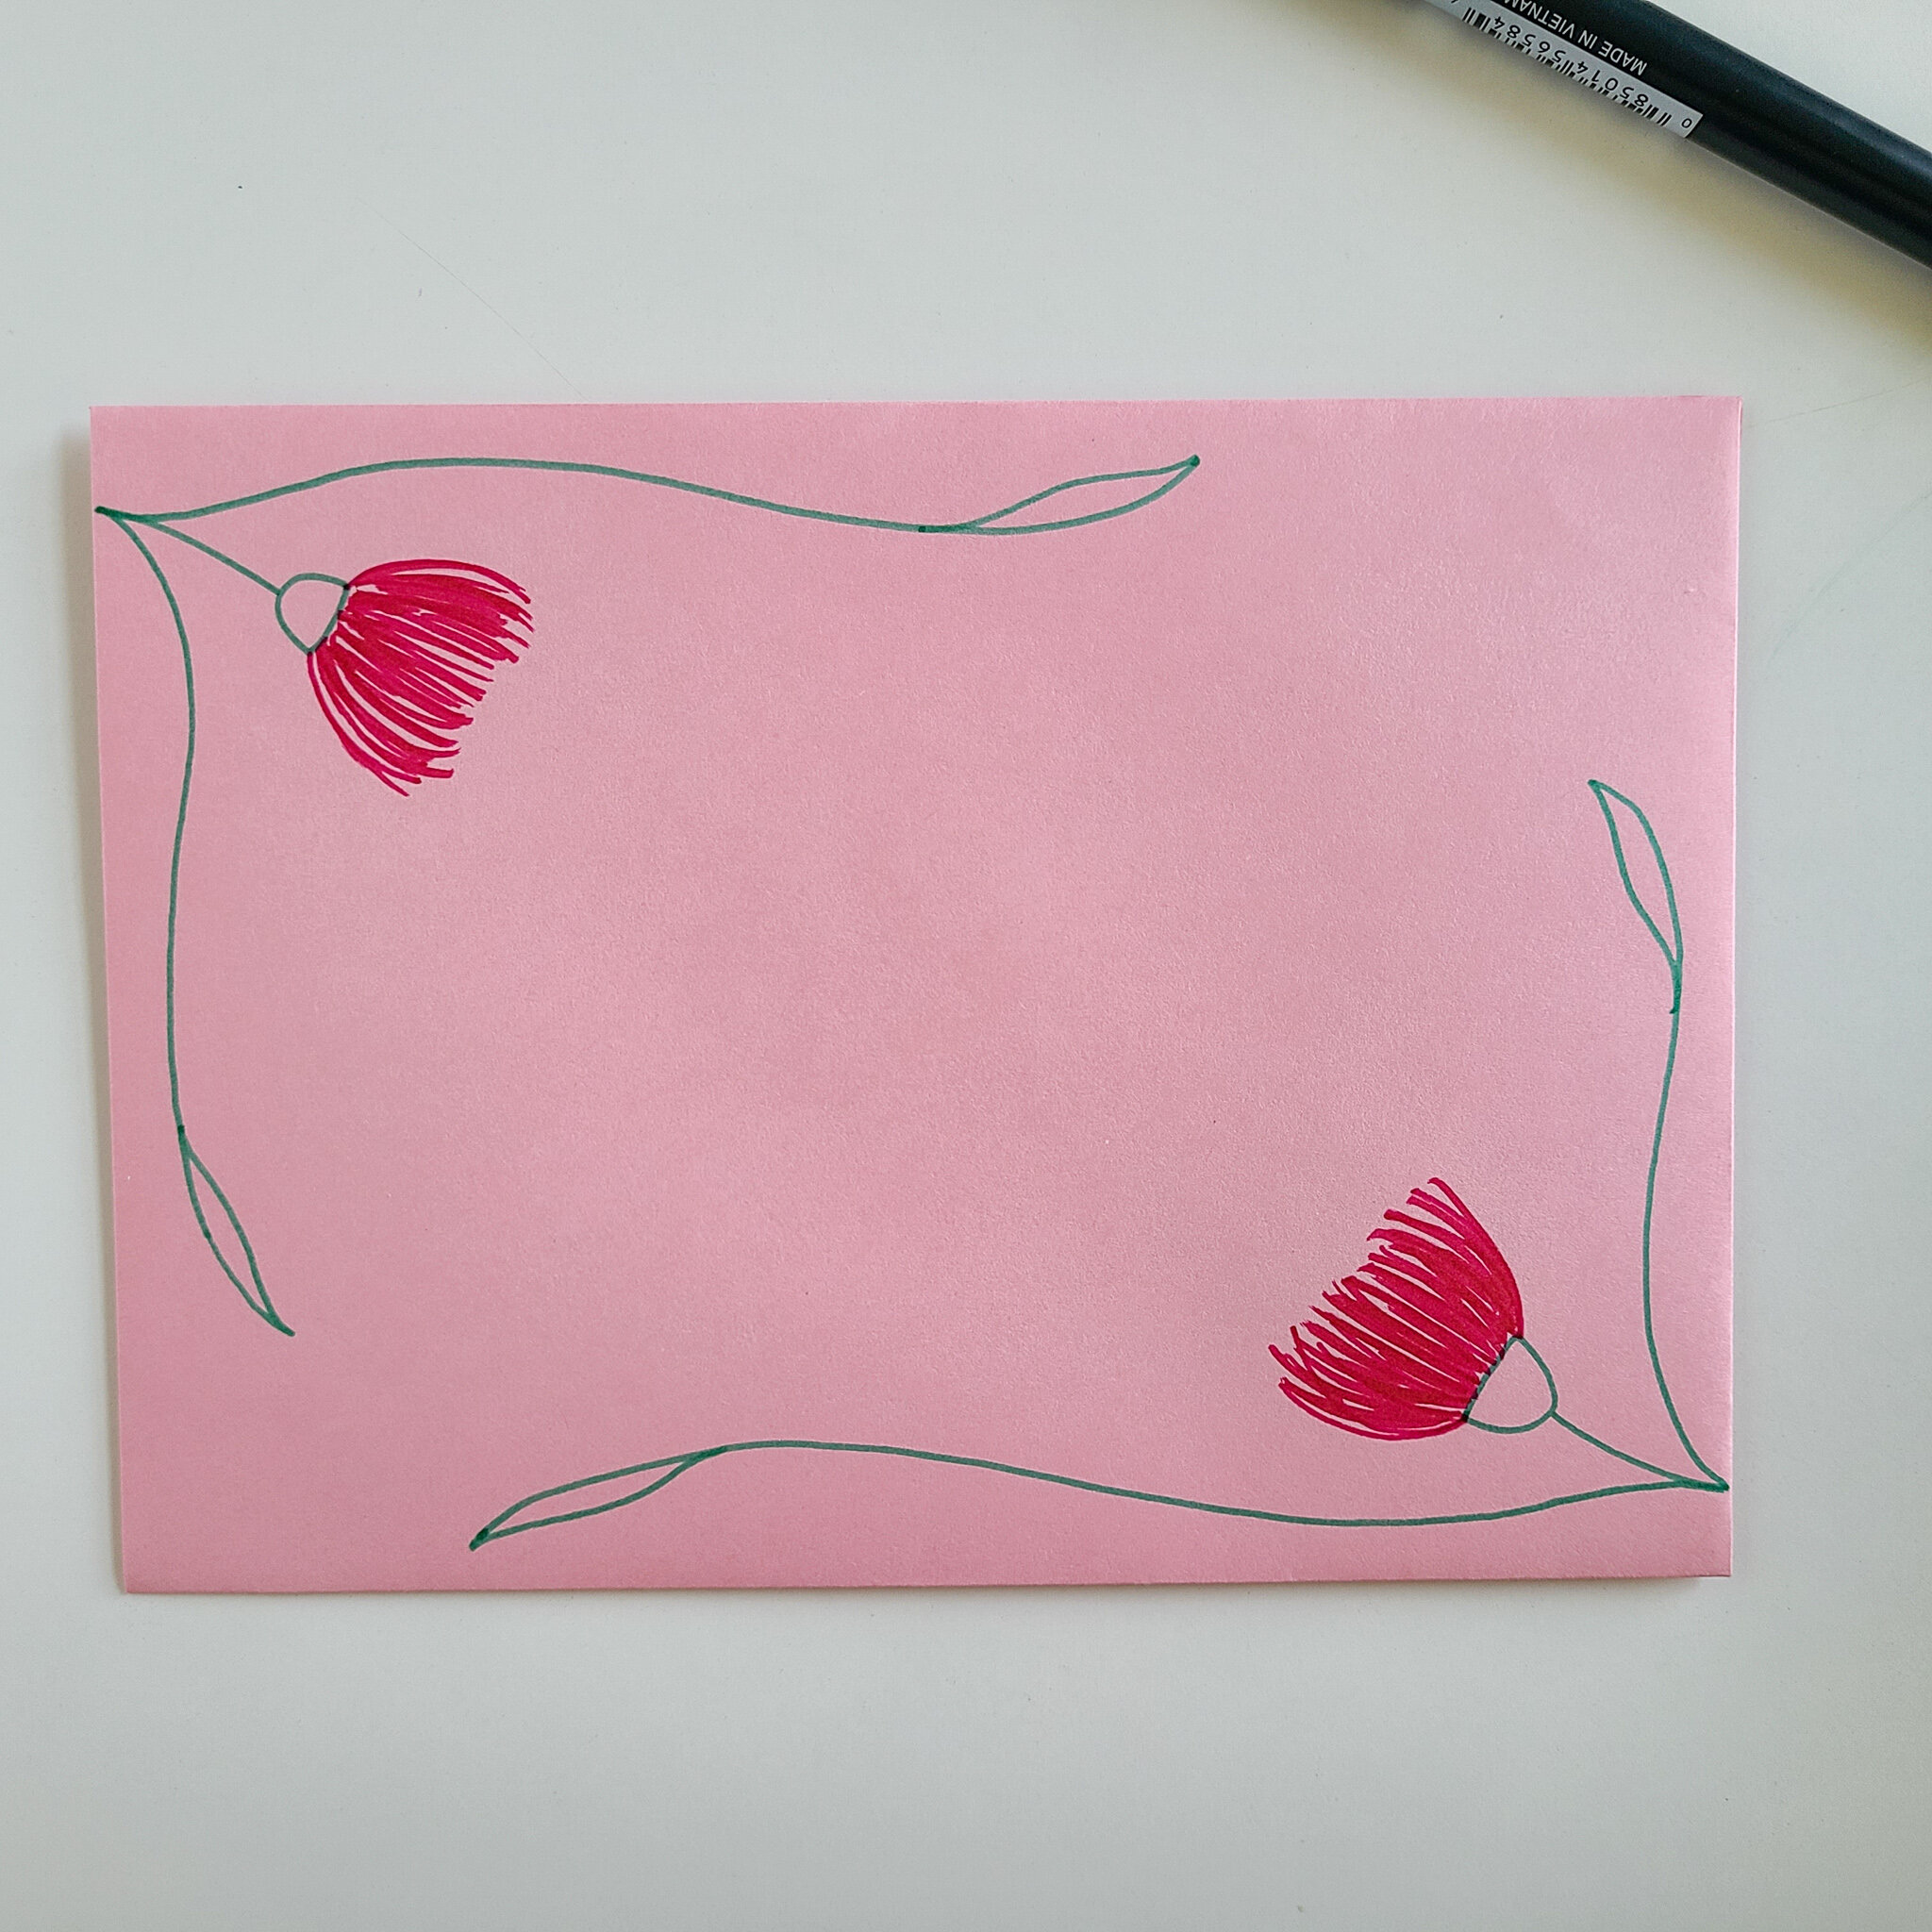
Step 1: Draw The flowers
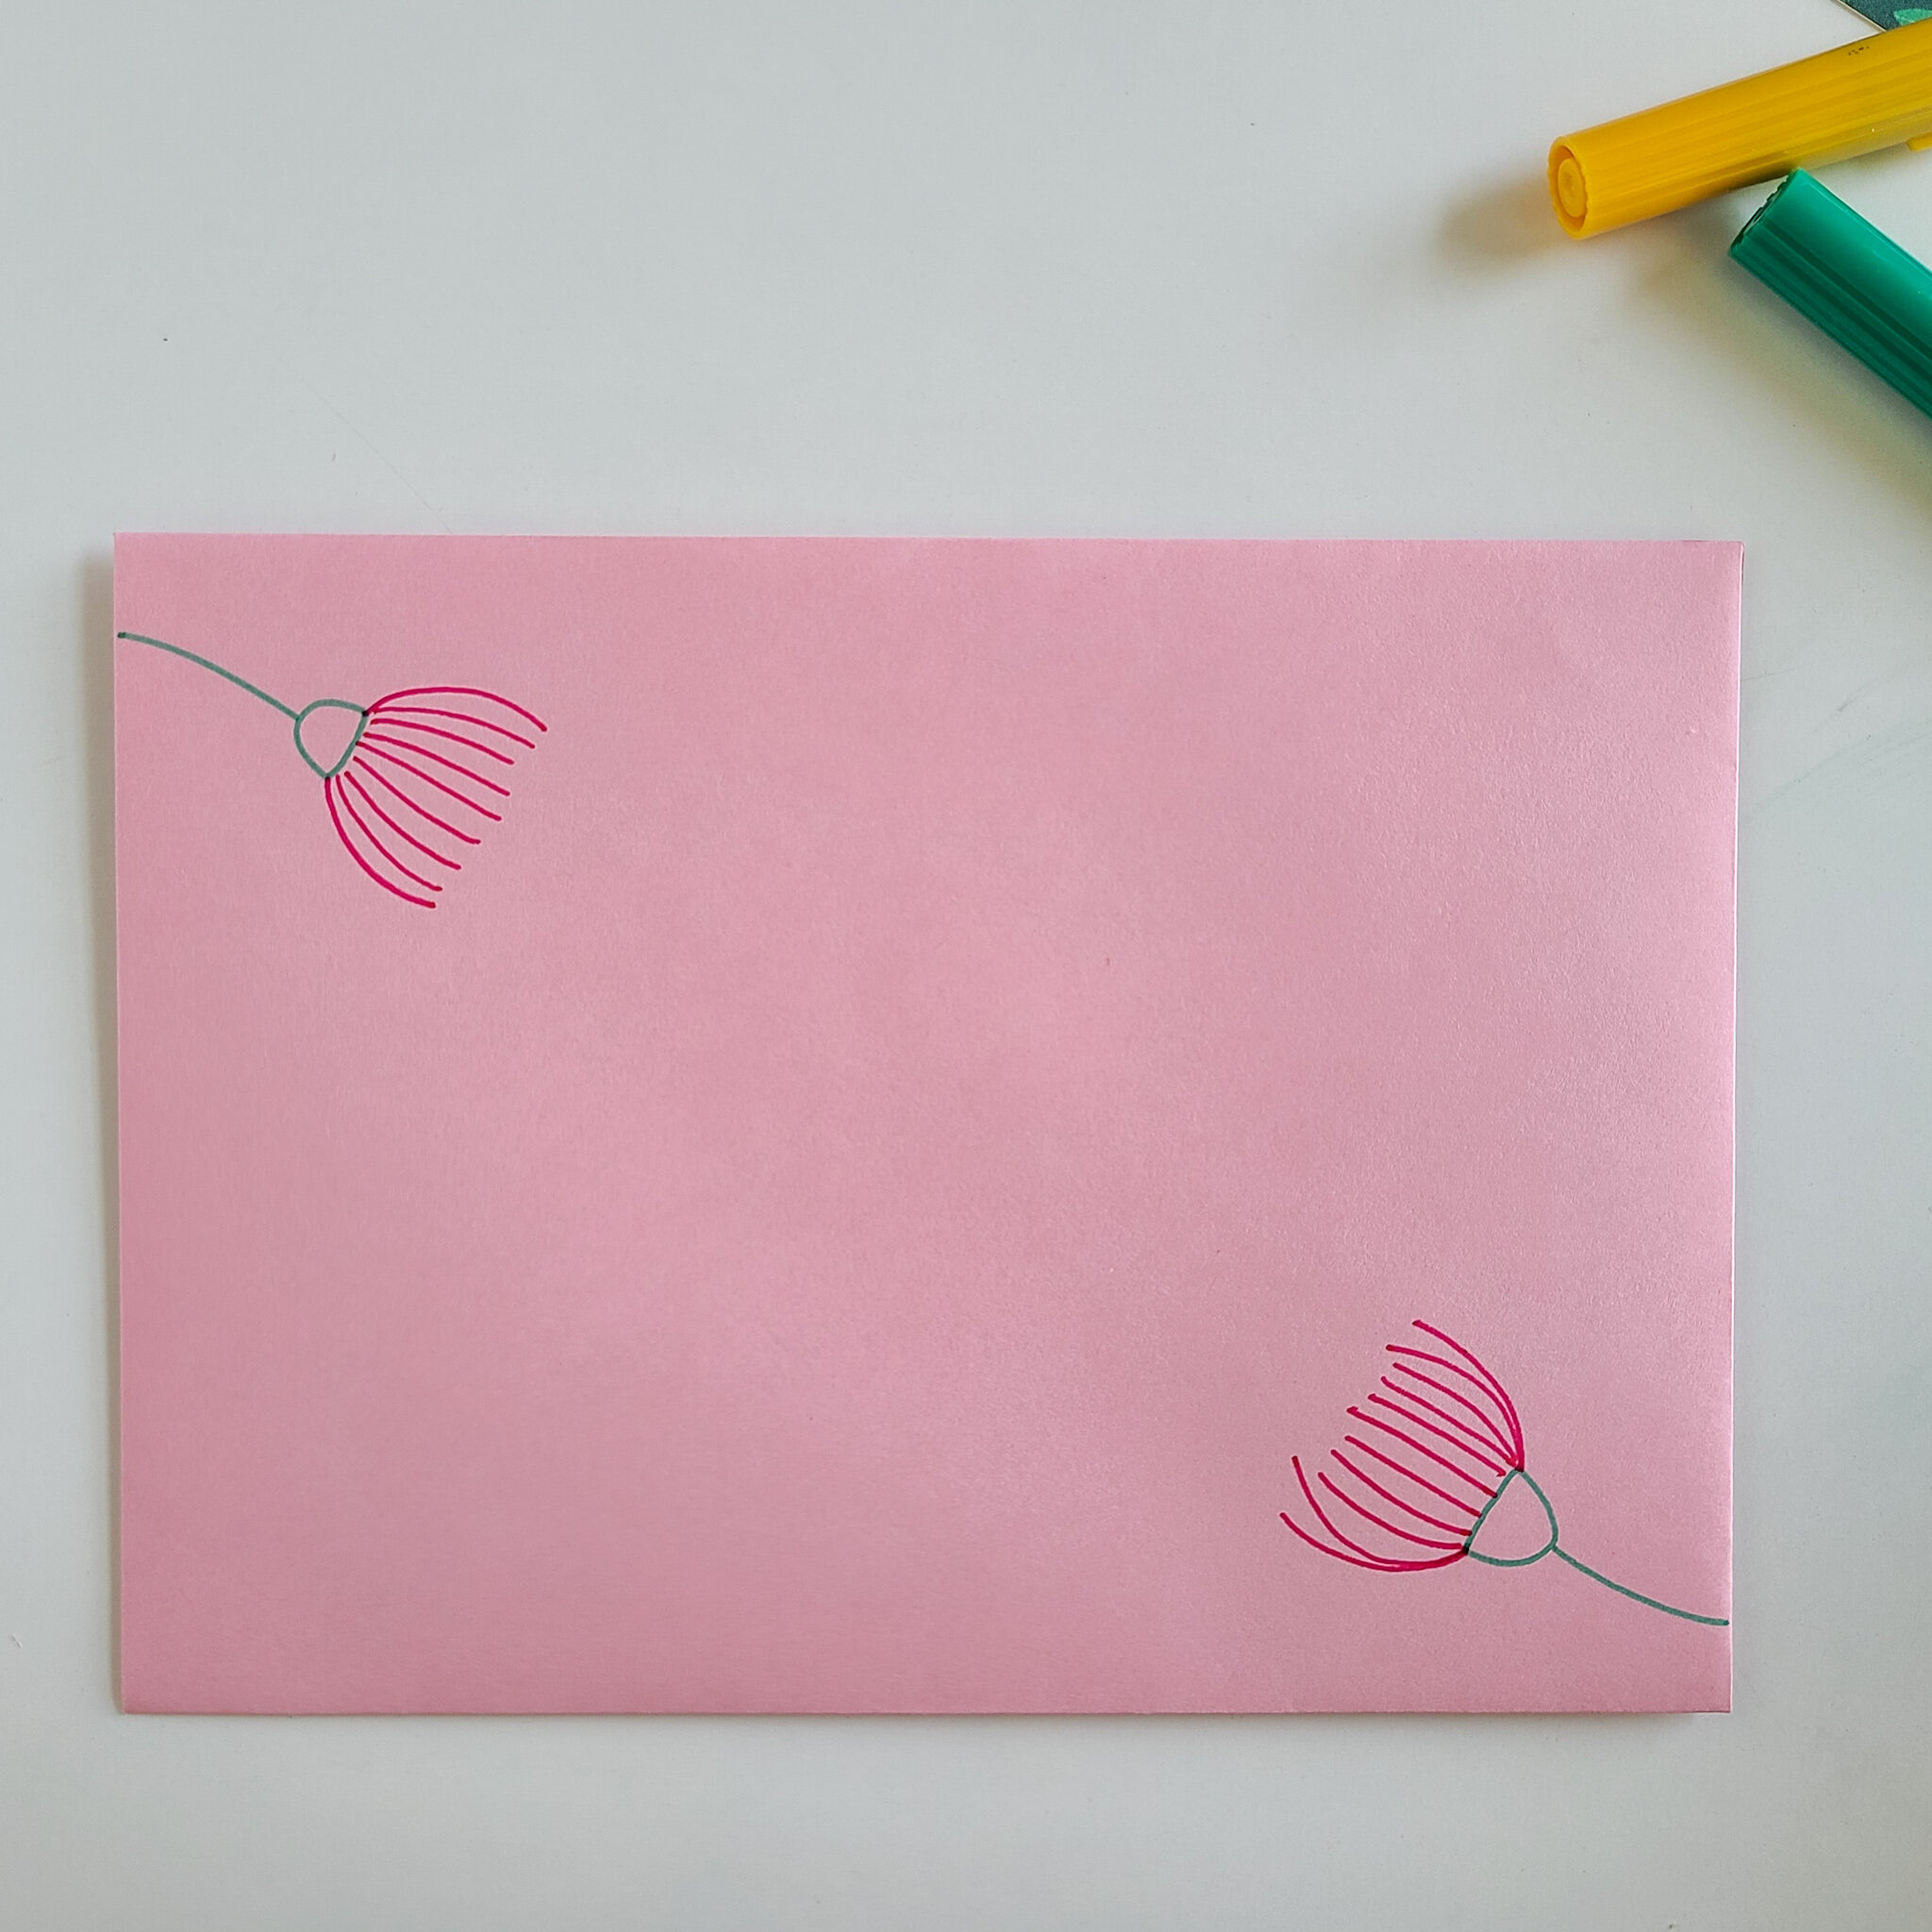
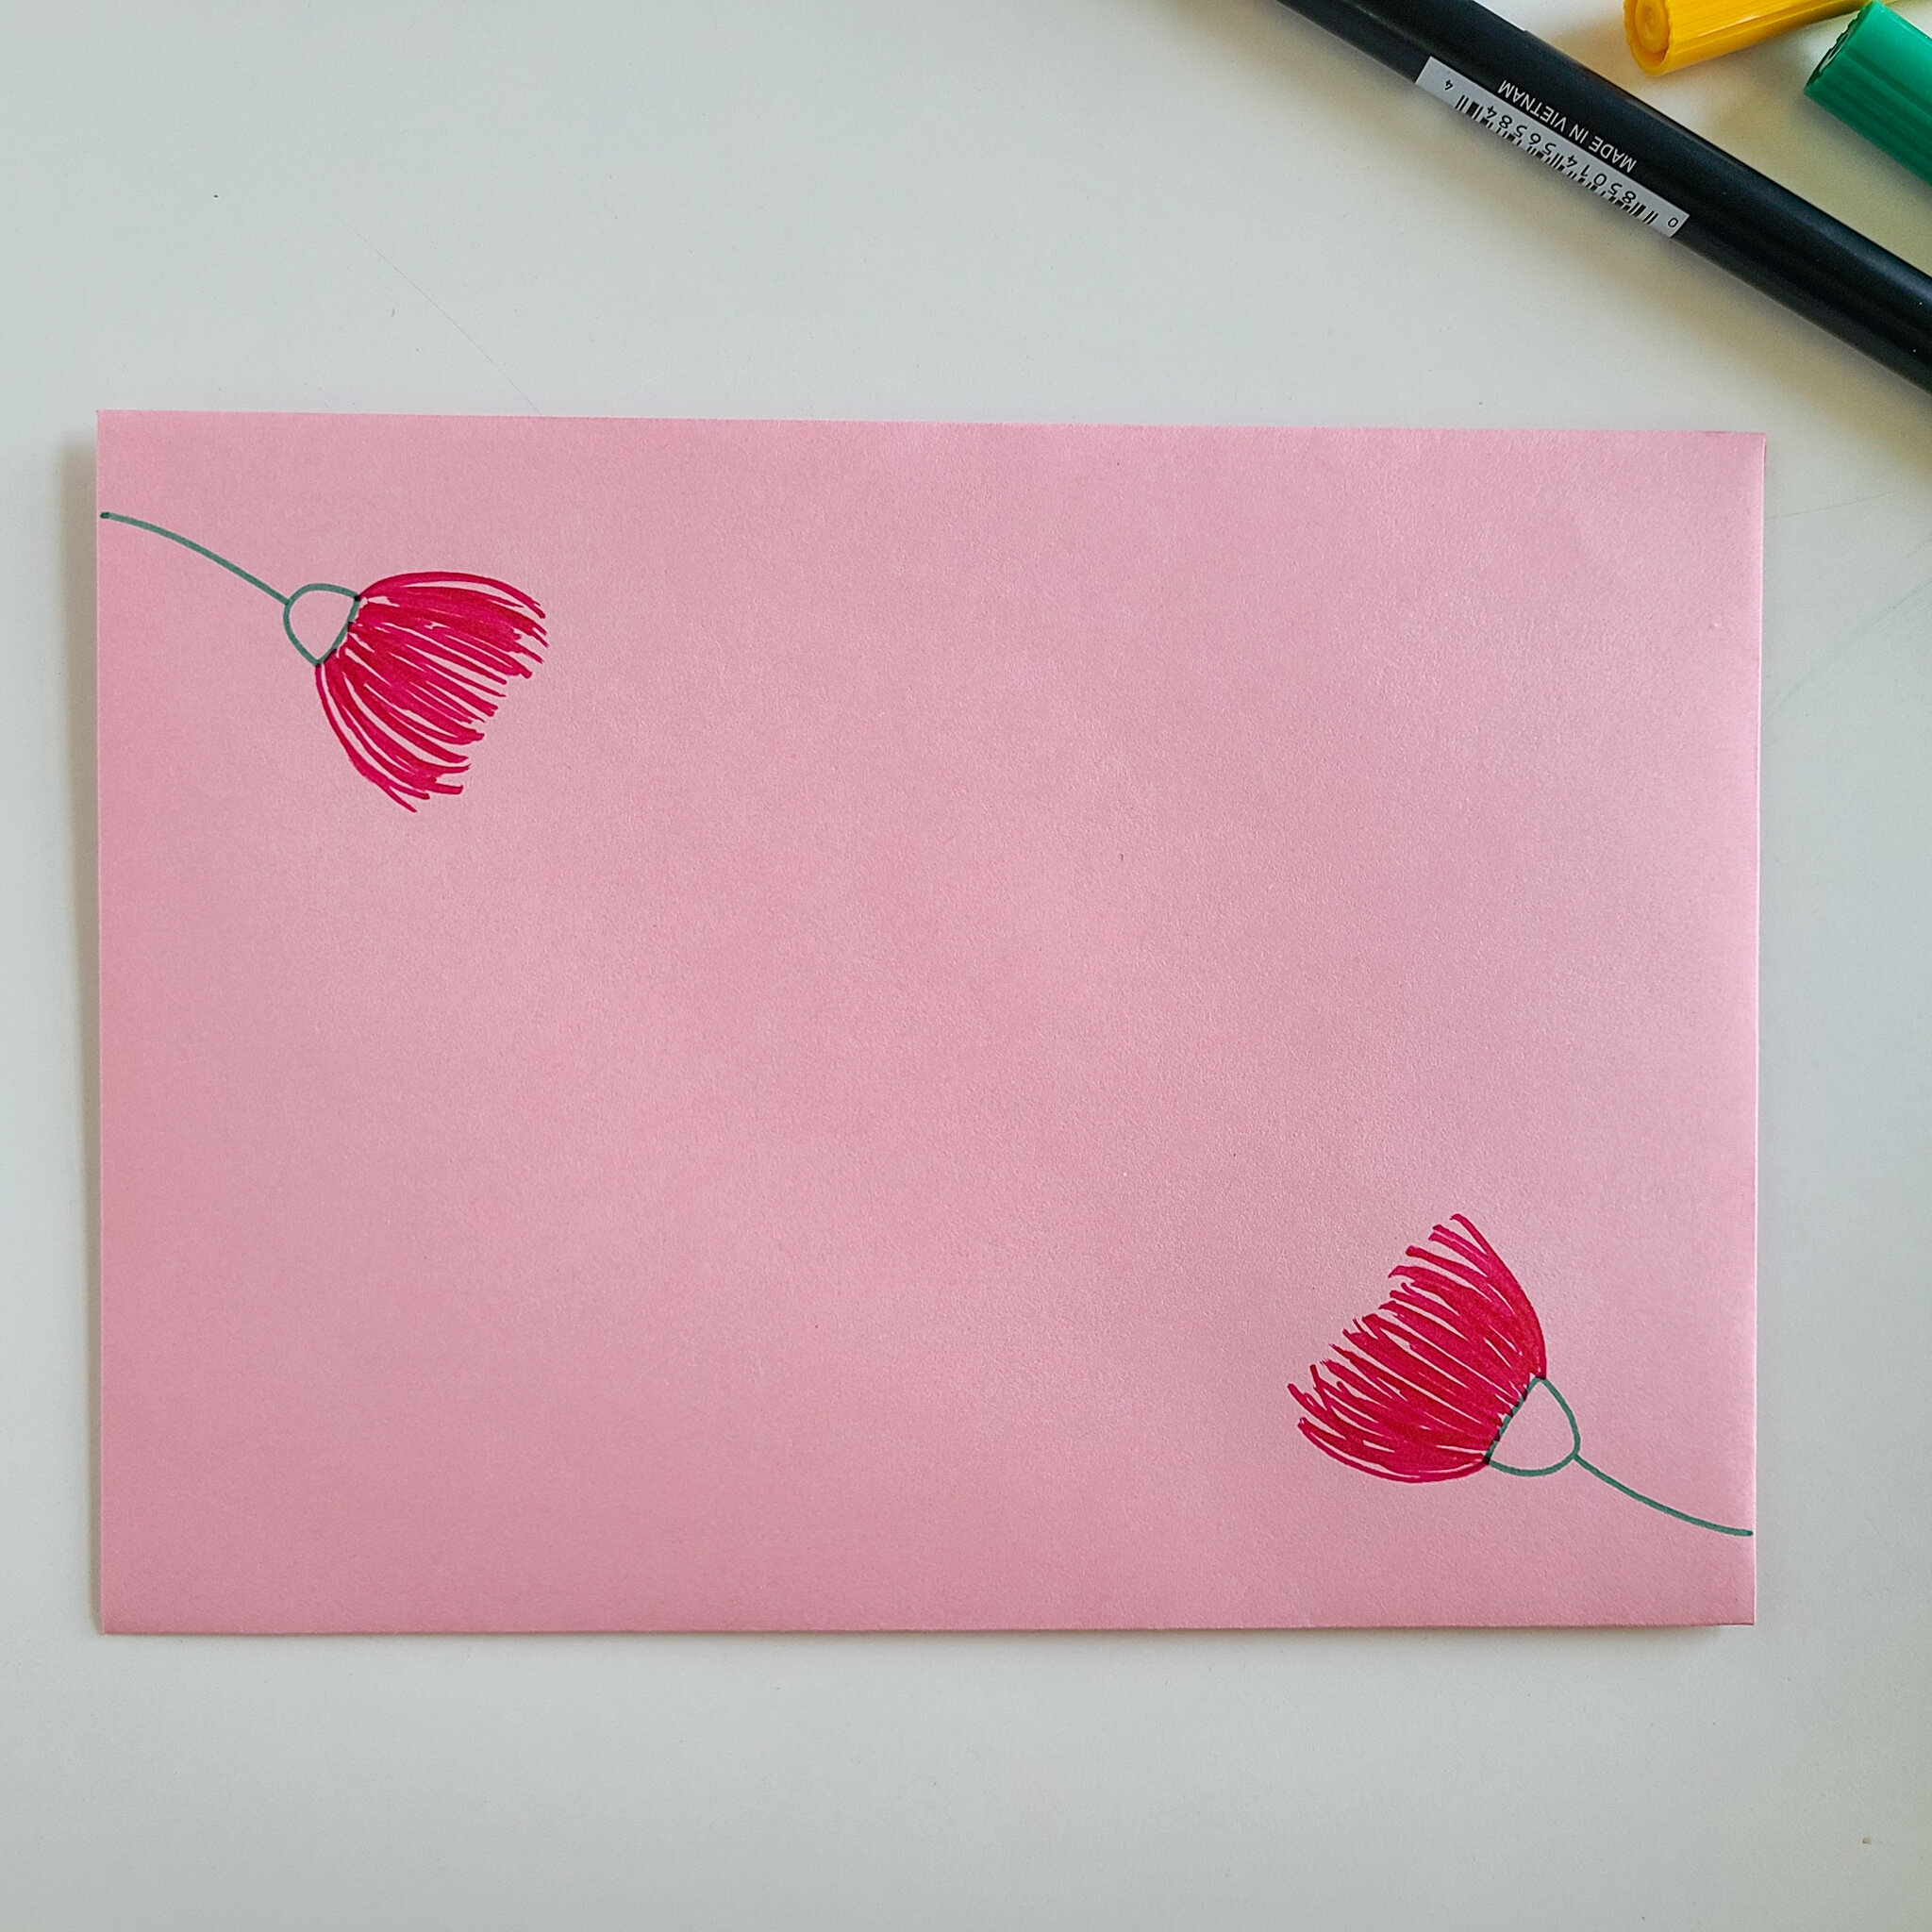
Using the light green marker, draw the stem of your flower in the top left and bottom right corners of the envelope.

Add the “petals” in pink. These “petals” are actually a bunch of small stamen (#themoreyouknow) that spray out from the center of the plant, so we’re just going to draw some simple lines here.
If you are using a brush pen, go back in and fill it out a bit more. Remember, we don’t want perfection here! Nature isn’t perfect, and our strokes shouldn’t be either.
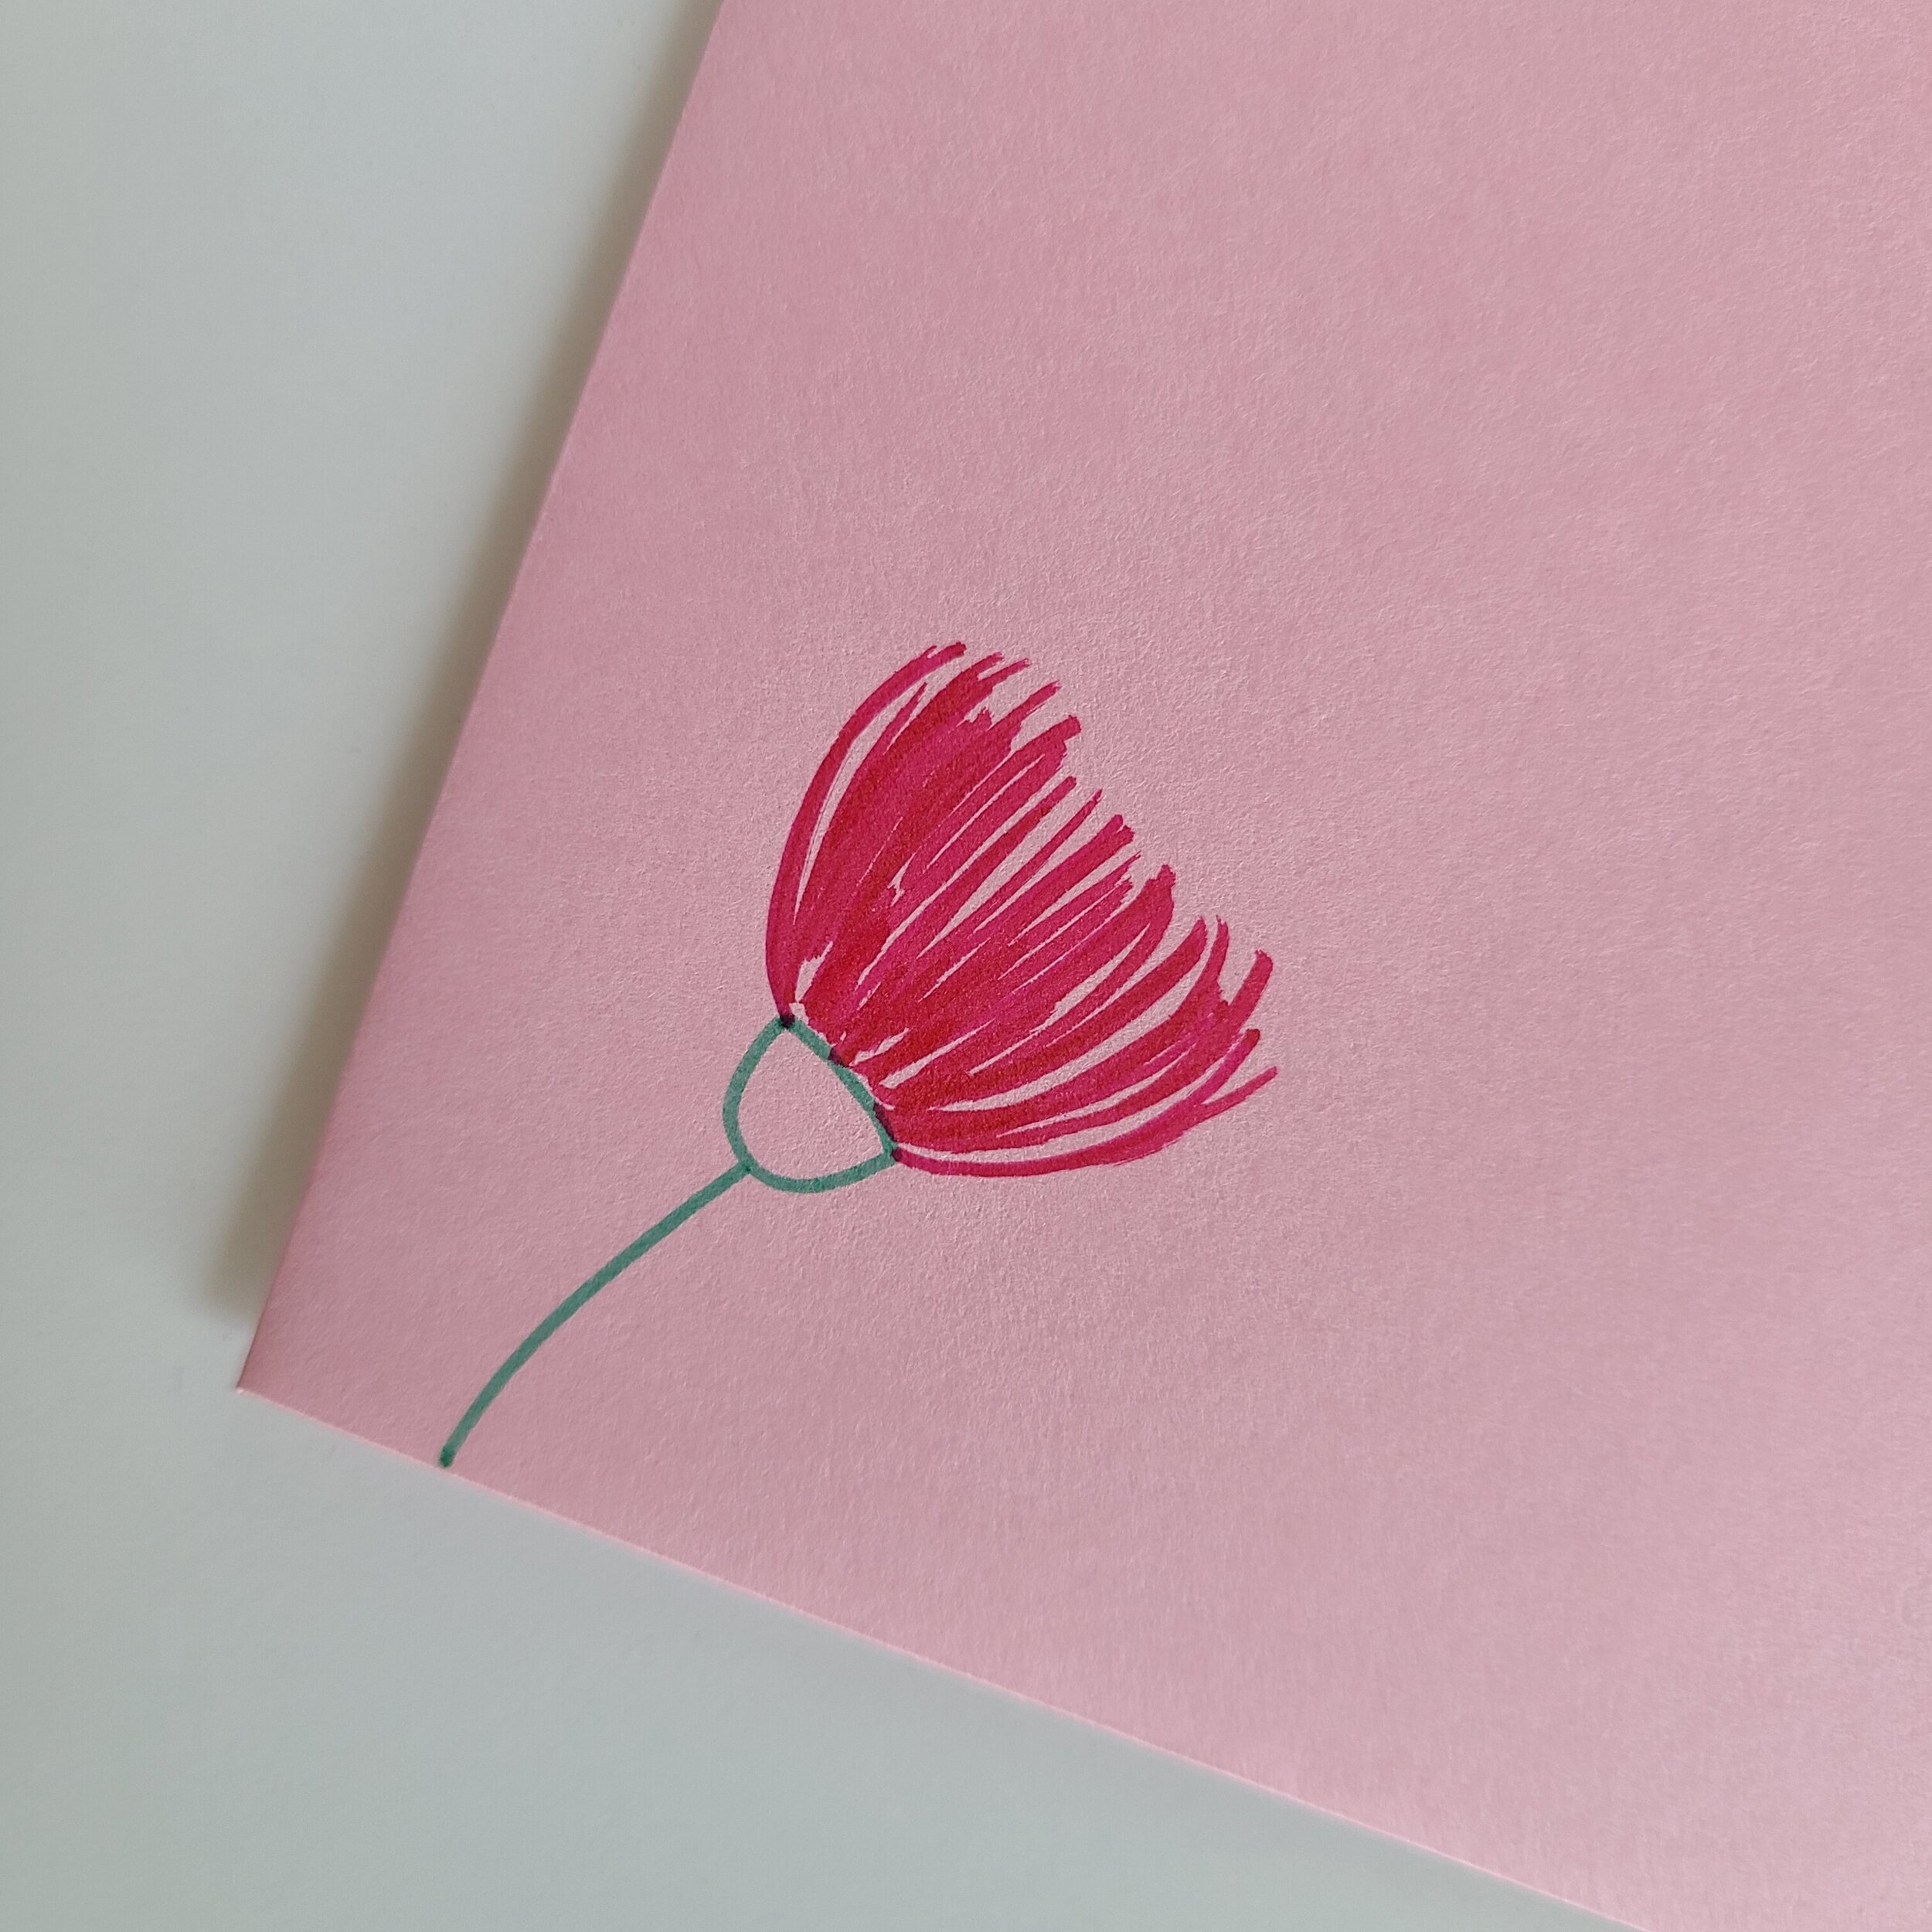
You can then use the yellow marker to add the seeds at the tops of the stamen. To give mine an airy appearance, I added the dots hovering just above the ends of the stamen. (Of course, I didn’t do this until the end, so I don’t have a close-up picture… but look closely at the last pic to see what I mean!)
Step 2: Draw the stems
Draw stems along the four sides of the envelope, two coming from the base of each flower. Be sure to leave space for the stamp!
Step 3: Draw the leaves
There are lots of different types of eucalyptus out there (hundreds, according to Izzy!), but I went with the long, thin leafed variety. Again, don’t be too precious with these. The great thing about drawing natural subjects is that we don’t want perfection. Keep it loose, keep it organic -- trust me, it will look good. I’ve never seen anyone draw a bad leaf!

Step 4: Fill it in
Using the brush end of your marker (if you’re using the Tombow or something similar), color in the leaves.
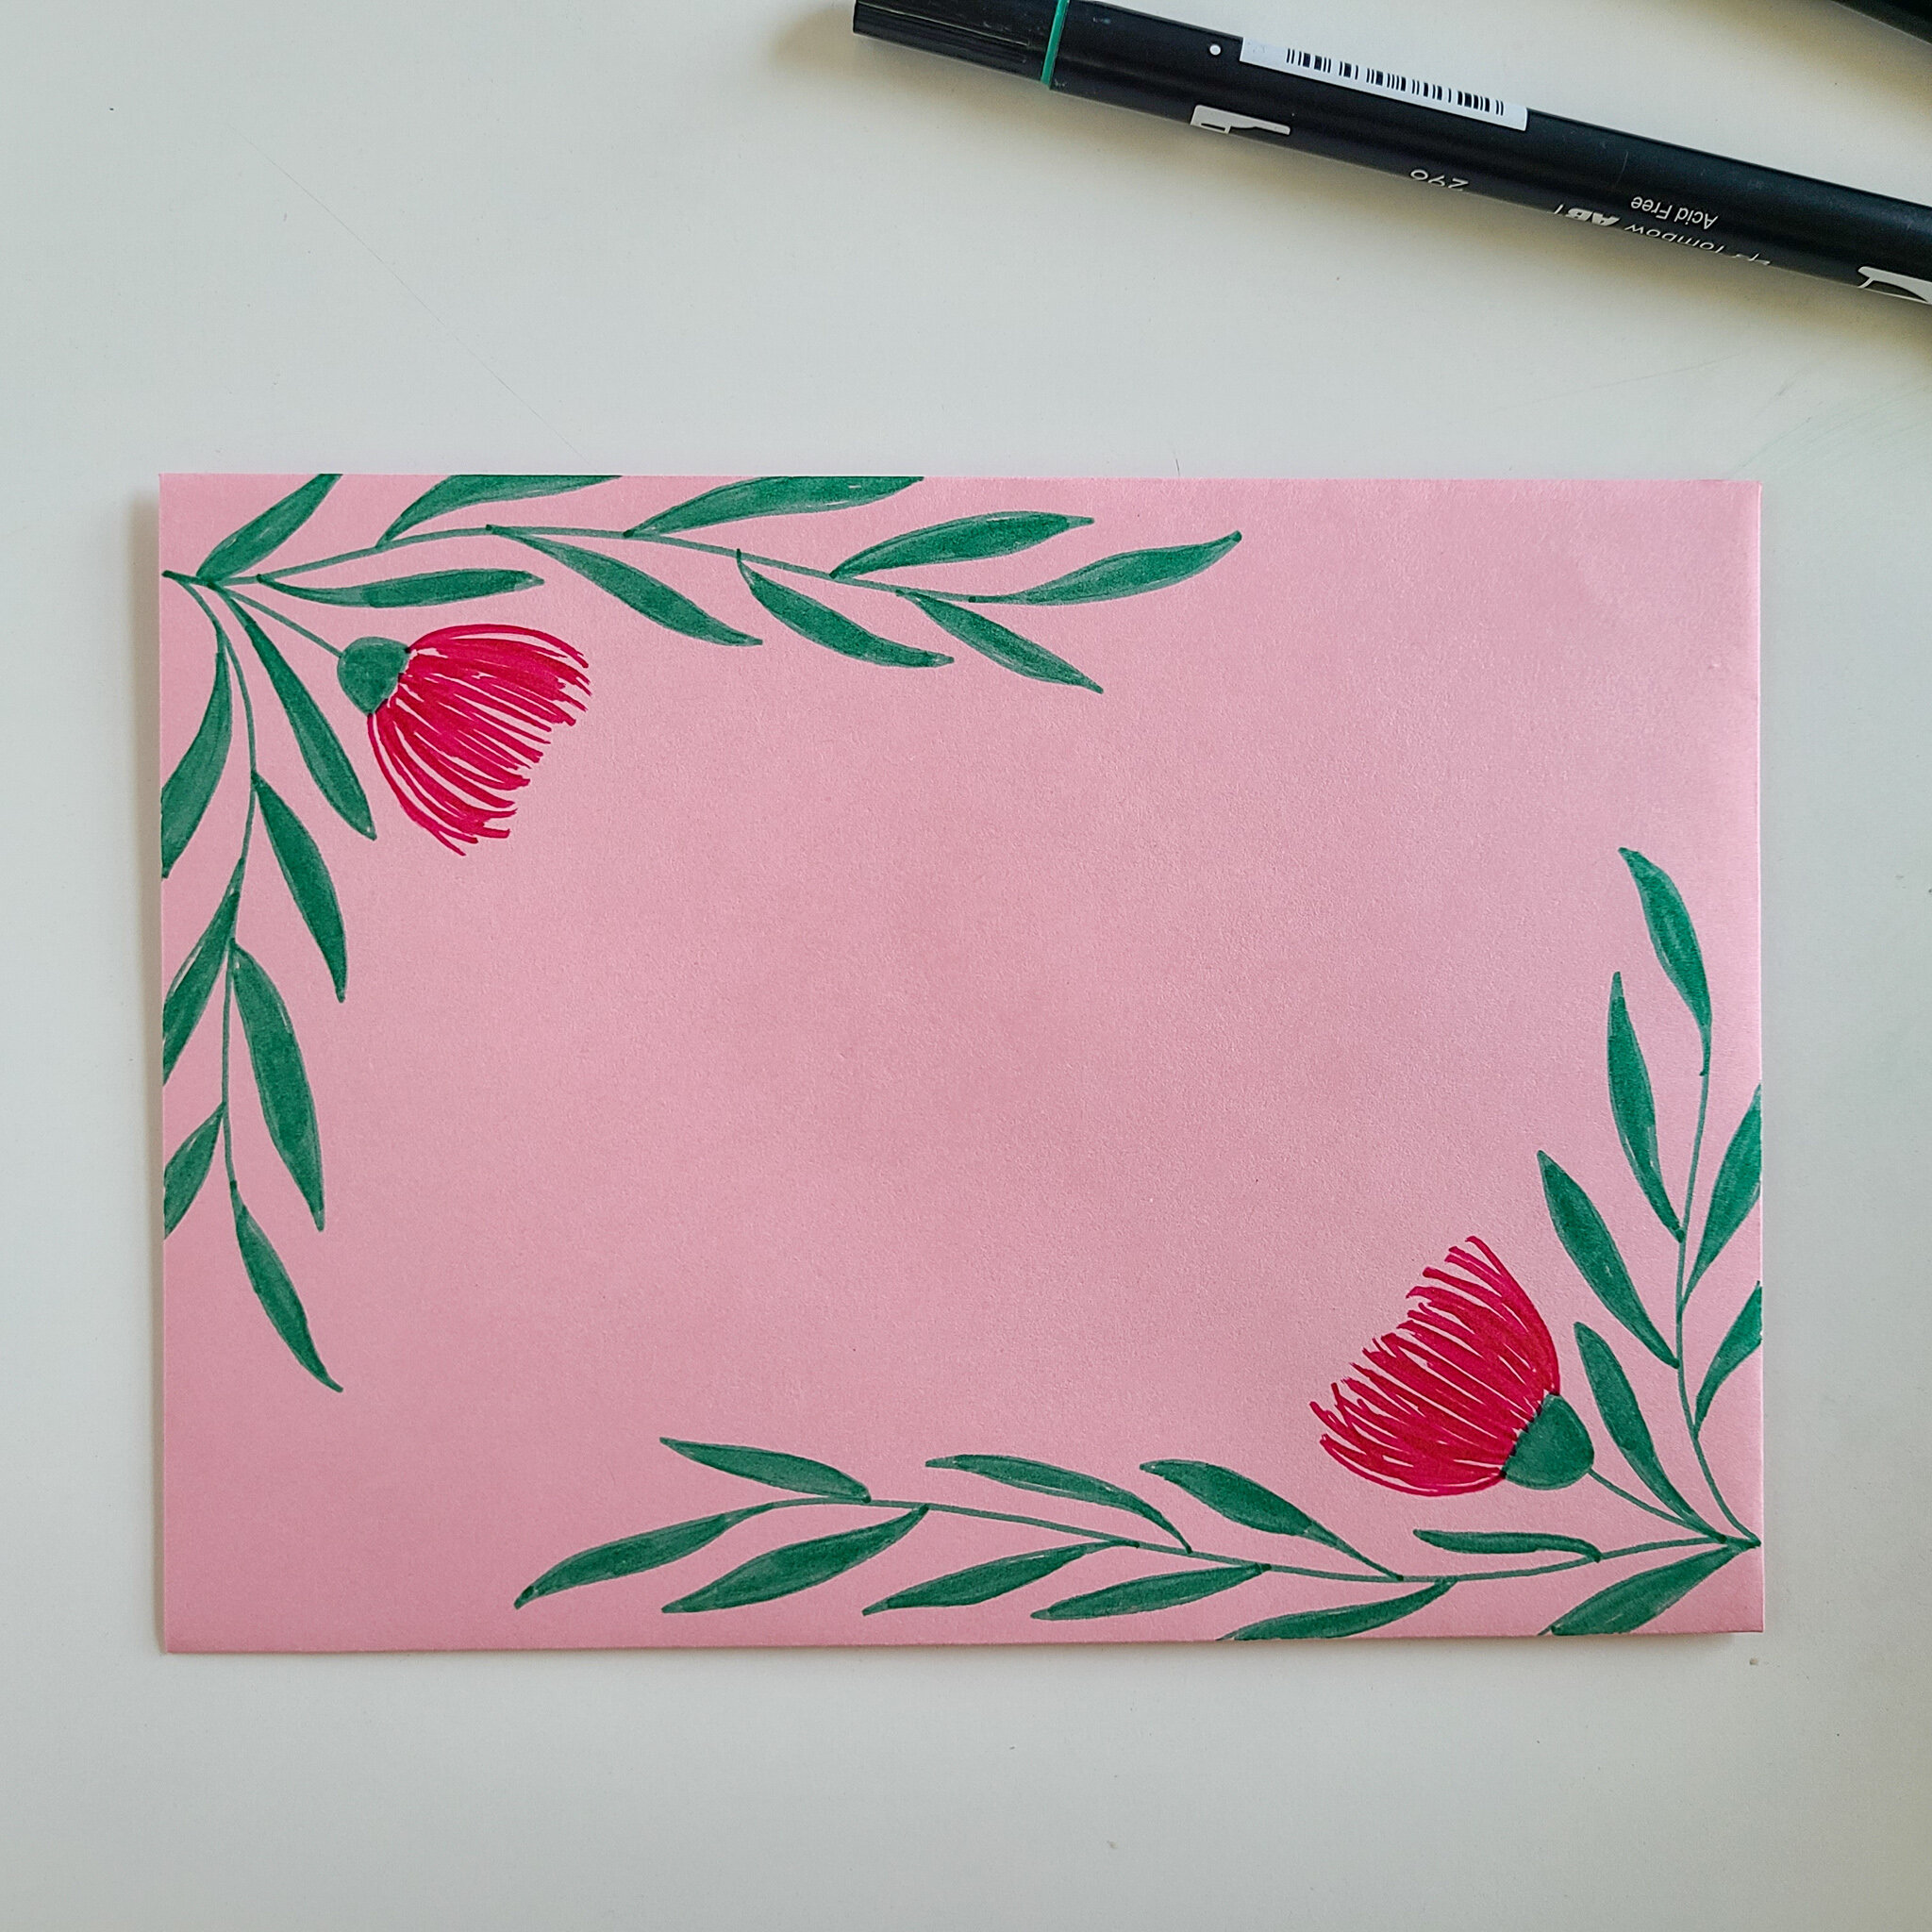
OPTIONAL: Step 5: Add detail
Use the bullet tip end of the dark green marker to add detail to your leaves. I added central veins and traced over the stem. This step is optional, but like Lebowski’s rug, it really ties everything together.


Et voila, you now have a lovely eucalyptus-framed envelope! Told you it was easy.

TIPS
Before you get started, here are a few tips:
It’s helpful to write your address first, either in light pencil to erase later or in final ink. Why? Because you don’t want to spend all that time drawing your beautiful eucalyptus only to switch two numbers in an address and have to toss the envelope. Not that that happened to me. (It totally happened to me).
If you are doing several of these envelopes at a time like I did (Wren invited her whole preschool class), I recommend doing one step at a time for all the envelopes. So first draw the stem on every envelope, then the flower on every envelope… you get the idea. That will go much quicker than stopping and starting on each one.
Don’t have Tombow markers? Crayola markers will work just fine!
You don’t have to stick with the envelope. This eucalyptus frame would look great around a quote in calligraphy or teeny tiny on a place card!
I hope you enjoyed this tutorial, and on a personal note, it feels good to be back. I can’t guarantee a post every week (hahaha… no), but the fog is starting to clear and I hope to be bringing you lots more inky fun as we enter the last/best months of the year. Stay tuned!
Did you make this? Share a pic on the ‘gram and be sure to tag @hooplaletters! And don’t forget to obscure the address. Sharing may be caring, but privacy ain’t bad either.